
 Save
Save
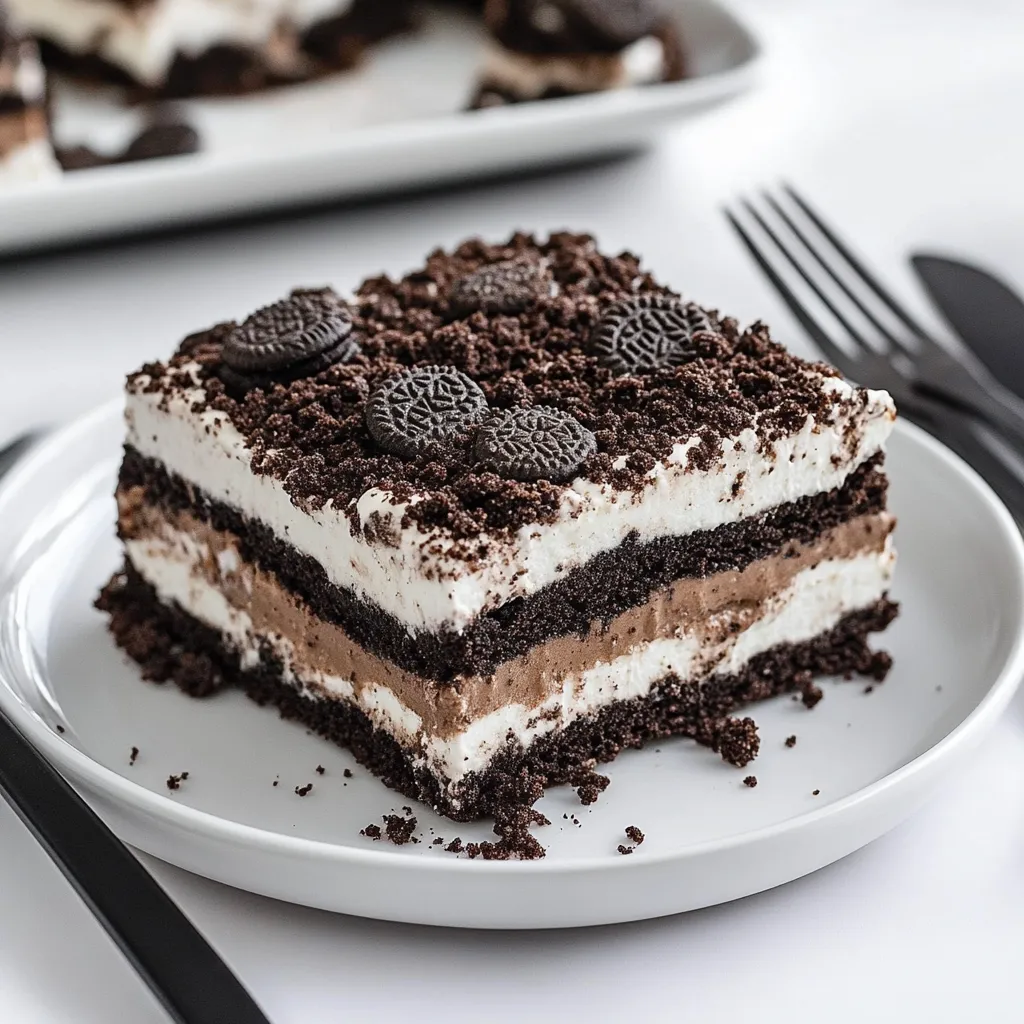
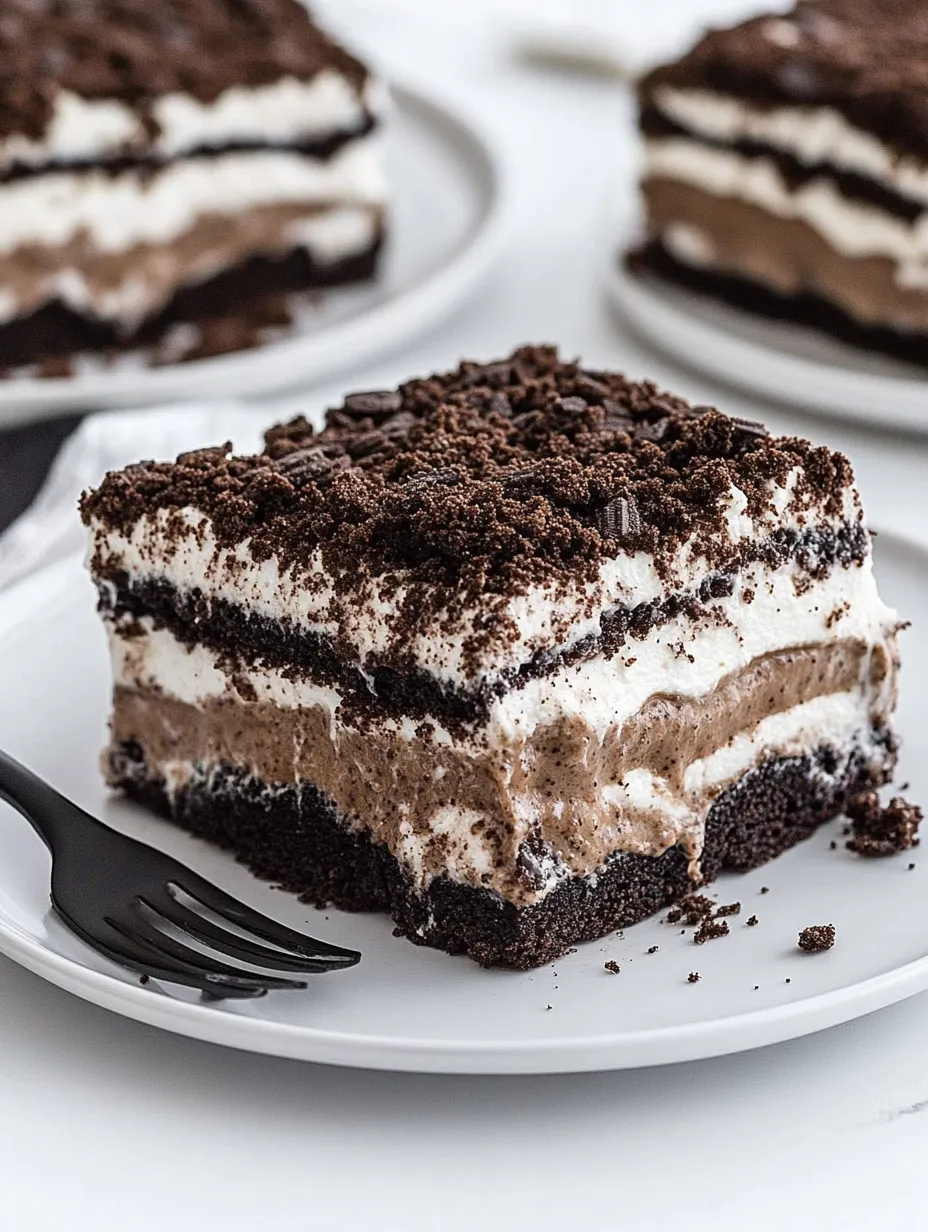
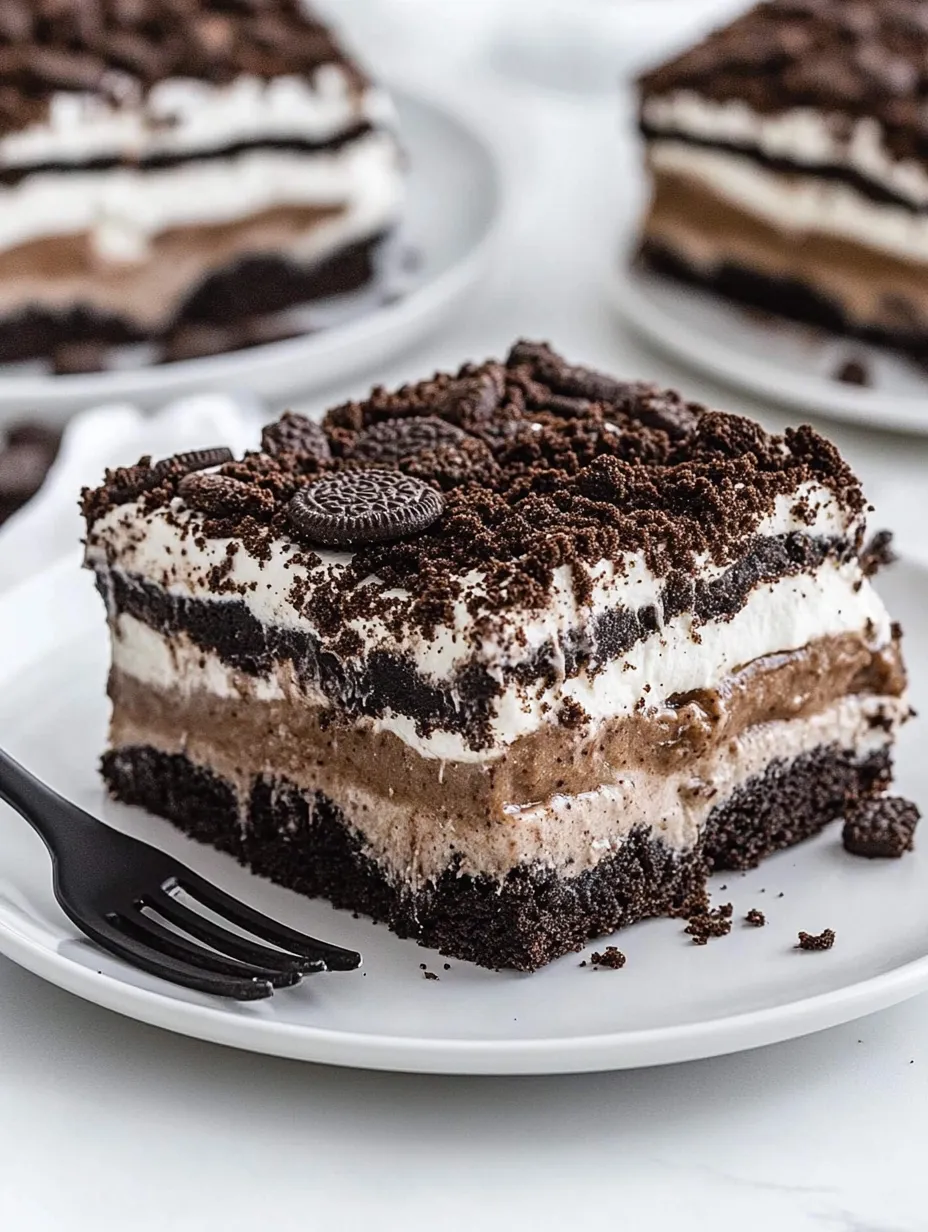
If you love chocolate and cookies, this is straight-up childhood happiness that’s super easy to share. I bring it to every get-together—kids and grownups ask for it by name every single time. You get no-bake layers of crunchy Oreos, creamy pudding, fluffy cheesecake filling, and a pile of Cool Whip.
Ran out of oven space at my niece’s party, so I whipped this up—and honestly, it was the first thing to vanish off the table. Now, my family asks for it on repeat.
Dreamy Ingredients
- Oreo cookies: classic ones work best, keep a few for sprinkling on top at the end
- Salted butter: brings out the chocolate flavor, and real butter gives it that extra pop
- Cream cheese: adds some tang and that cheesecake feel—full-fat is the way to go for ultimate smoothness
- Powdered sugar: amps up the sweetness and blends nicely for a silky finish—sift if you want everything extra smooth
- Cool Whip: makes it pillowy and chill, just let it thaw in the fridge first
- Vanilla extract: ties it all together—use the real stuff if you can swing it
- Half and half or whole milk: thickens up the pudding without making it too runny—colder is better for mixing
- Chocolate instant pudding mix: delivers that rich classic chocolate flavor and gets the texture just right
- All the stuff here really counts—pick the freshest you can for the best layers.
Easy Step-by-Step
- Crush the Oreos:
- Pop all the cookies into a plastic bag and smash them up with a rolling pin, or throw them in a food processor for fine bits. Save a few for topping later.
- Make the Base:
- Melt your butter, pour it right over the crumbs, and mix so every bit gets a coating. Press into the pan, reaching all the corners, and stick it in the fridge for ten minutes.
- Cheesecake Layer:
- Leave cream cheese out ‘til it’s soft and easy to mix. Beat with powdered sugar until fluffy, then lightly fold in the vanilla and some thawed Cool Whip. You can swirl in a few Oreo pieces gently to keep it airy.
- Add Cheesecake Mix:
- Smooth the filling evenly over your chilled crust—use a spatula to get it right to the edges. Back into the fridge while you prep the pudding.
- Pudding Time:
- Dump cold half and half (or whole milk) into a bowl with both pudding mixes. Whisk hard for a couple minutes until it thickens up. Fold in some more crushed Oreos for chocolatey crunch.
- Put It All Together:
- Spread the pudding gently over the cheesecake layer. Let it hang out in the fridge a bit so everything sets up well.
- Cool Whip Finale:
- Spoon the rest of the Cool Whip on top so it’s billowy. Finish with all the leftover Oreo crumbs you’ve got.
- Chill Until Firm:
- Cover up and pop in the fridge for at least four hours. Everything will set and slice clean, and flavors get even better.
The cream cheese layer makes this incredible—I love seeing the kids trying to figure out why it’s so creamy. My brother’s always sneaking extra slices before dinner, but the chocolate on his fingers gives him away every time.
Storage Guide
Wrap up leftovers tight with foil or plastic, and park them in the fridge. It honestly tastes even richer the next day when the layers meld. Want to freeze? Cut into pieces, and freeze separately—just thaw overnight when you're ready to snack.
Switch-Ups & Alternatives
Don’t want to use Cool Whip? Go with sweetened whipped cream, just beat it until it stands up but don’t overdo it. Gluten-free chocolate sandwich cookies swap just fine. Want a new flavor? Grab instant white chocolate or vanilla pudding and try Golden Oreos for something different.
Tasty Serving Ideas
This one’s made for sharing. Cut big pieces and pile on extra Oreos or drizzle with some warm fudge sauce if you’re feeling fancy. Serve it nice and chilled on a hot day. For a fun twist, toss on berries or chopped nuts just before serving.
Fun Backstory & Traditions
You’ll see Oreo lasagna at just about every summer potluck and picnic in America. Layered no-bake treats like this started popping up in the ‘70s when folks wanted easy ways to feed a group—no oven needed. It’s got roots in old-school Icebox cakes from when refrigerators were new, and home cooks were all about quick desserts.
Frequently Asked Recipe Questions
- → Is it okay to swap in low-fat cream cheese or a lighter whipped topping?
Absolutely! Go with the lighter stuff if you want a less rich treat. It might turn out a little softer in texture, but it’ll still taste amazing.
- → How long should I cool it before sharing?
Stick it in the fridge at least 4 hours so the layers lock in and the flavors mix together. If you wait overnight, slicing it up will be even easier.
- → Can I make it a day or two ahead?
For sure! Chill it in the fridge for up to 2 days before serving. It's perfect for planning ahead for friends or family get-togethers.
- → Do I have to use chocolate pudding?
Nope, try other instant pudding flavors like vanilla or cheesecake for a change. Instant kinds work best, though!
- → What's the best way to smash up the Oreos?
Toss them in a food processor for quick crumbs, or seal them in a bag and hit them with a rolling pin until they’re crushed.