
 Save
Save
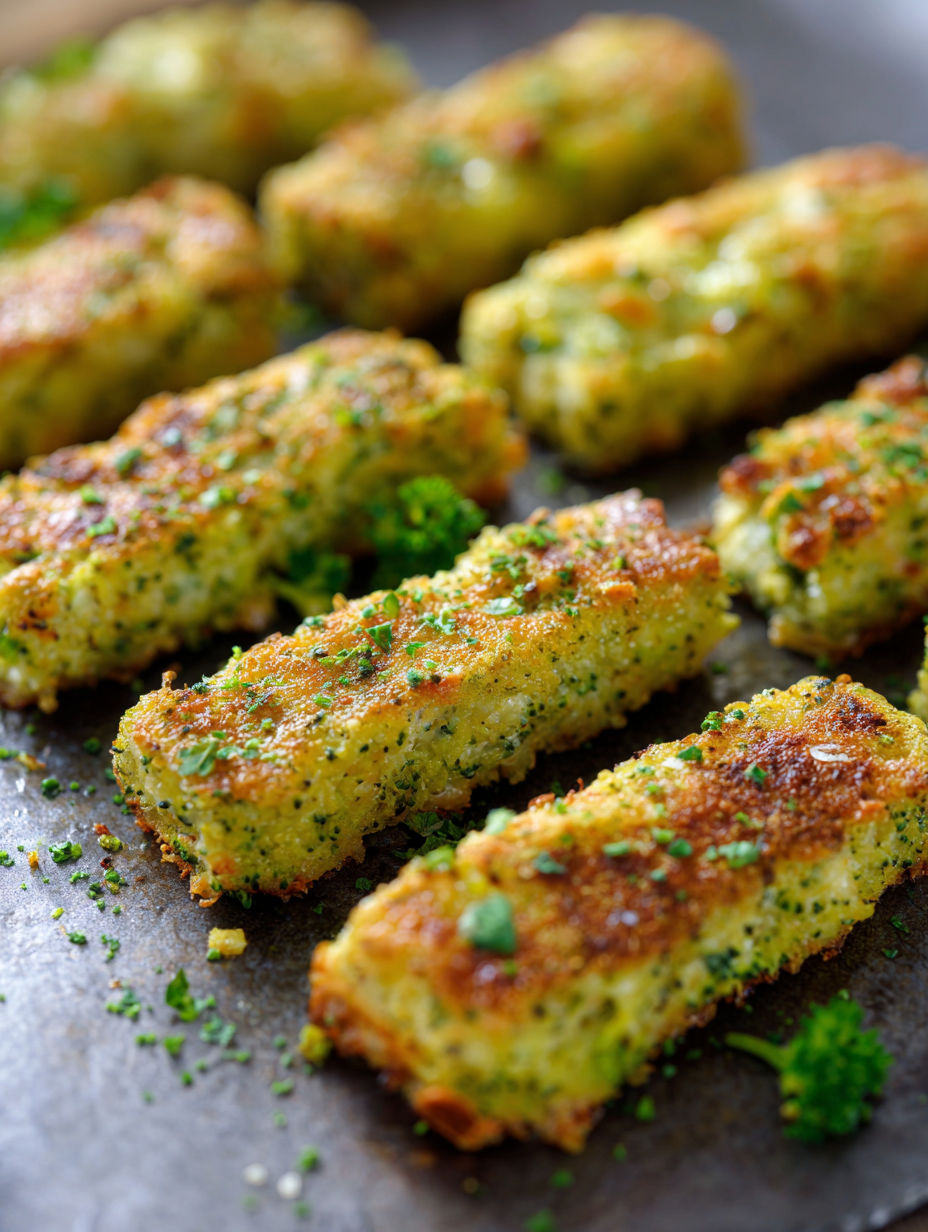
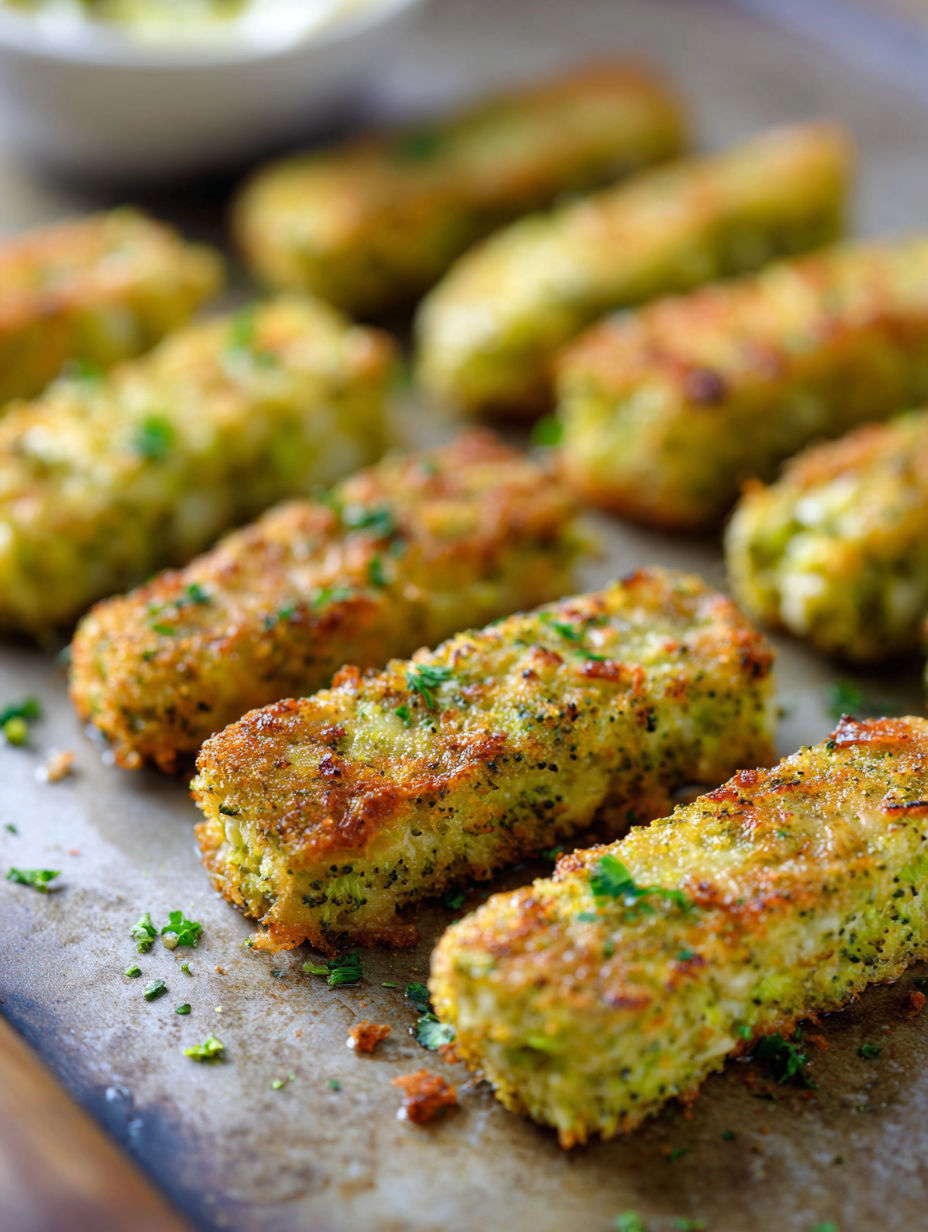
These broccoli cheese sticks are my secret weapon for sneaking veggies into the kids’ snacks without a fuss. They come together quickly with simple ingredients and have that perfect balance of crispy outside and gooey cheesy inside that even picky eaters love.
I whipped these up last minute one afternoon and ended up with a batch the whole family kept coming back for during homework time.
Ingredients
- Frozen broccoli: holds its shape and flavor well plus it is easy to steam evenly
- Italian bread crumbs: add a nice herby crisp coating so the sticks don’t fall apart
- Sharp cheddar cheese: melts perfectly while providing a strong cheese flavor kids recognize and enjoy
- Eggs: bind everything together naturally without heaviness (fresh large eggs work best for consistency)
Instructions
- Preheat and Prepare:
- Preheat your oven to 375 degrees Fahrenheit and line a baking sheet with parchment paper to prevent sticking. This step is essential to make clean up easier and to ensure the sticks cook evenly without burning on the bottom.
- Steam and Cool Broccoli:
- Place the frozen broccoli in a steamer basket over boiling water and steam until tender which should take about 6 to 8 minutes. Drain excess water and let it cool slightly before the next step to avoid cooking the eggs when mixing.
- Process Broccoli:
- Transfer the cooled broccoli to a food processor fitted with a standard 's' blade and pulse for about 30 seconds until smooth. If you don’t have a food processor, mash the broccoli manually with a potato masher or chop finely by hand to achieve a similar texture.
- Mix Ingredients:
- In a large mixing bowl, combine the broccoli puree with the bread crumbs, shredded cheddar cheese and eggs. Stir everything together until you get a uniform mixture. This binding step is where the magic happens so mix thoroughly but gently.
- Form Sticks and Bake:
- Use a spoon or your hands to shape the mixture into sticks about the size of chicken fingers. Place them on the parchment-lined tray with some space between each. Bake at 375 degrees for roughly 18 to 20 minutes until they turn golden brown and firm to the touch.
- Optional Broil for Crispiness:
- For a crunchy finish, switch the oven to broil for the last 2 minutes but watch closely to avoid burning. This extra step adds texture and makes the cheese caramelize slightly for extra flavor.
Sharp cheddar is my favorite here because it melts beautifully and adds a rich flavor that stands up well against the broccoli. I remember making these for my niece the first time she turned her nose up at green veggies and now she asks for them whenever she visits.
Storage Tips
Store leftover sticks in an airtight container in the refrigerator for up to three days. Reheat in the oven or toaster oven for best crispiness. Avoid microwaving as it makes them soggy.
Ingredient Swaps
Swap cheddar for mozzarella for a milder, gooier stick or try pepper jack for a spicy twist. Use gluten free breadcrumbs if you have gluten sensitivities or want to add a different flavor profile. Try adding finely chopped cooked bacon or ham to the mixture for an extra savory boost.
Serving Ideas
These are great dipped in ketchup, ranch dressing or a simple garlic aioli. Serve alongside soup or salad for a hearty lunch or light dinner. They also make excellent finger food for parties or school lunches.

These broccoli cheese sticks are a delicious way to enjoy vegetables that even picky eaters request again and again.
Frequently Asked Recipe Questions
- → Can I use fresh broccoli instead of frozen?
Yes, fresh broccoli can be steamed until tender and used in place of frozen. Just ensure it's well cooled before processing.
- → What cheese works best for these sticks?
Sharp cheddar cheese offers great flavor and melts perfectly, but you can try other cheeses like mozzarella for a milder taste.
- → How do I make the sticks crispier?
After baking, broil the sticks for 1-2 minutes while watching closely to add a crunchy finish without burning.
- → Can I prepare these ahead of time?
Yes, form the sticks and refrigerate them for up to a day before baking to save time on busy days.
- → Are these sticks suitable as a snack or side dish?
Absolutely! Their size and flavor make them versatile for snacking or complementing meals.