
 Save
Save
Cheesy oven-baked tacos are my easy go-to when I want a satisfying meal that feels a little special but does not require too much effort. This recipe lets you enjoy warm melted cheese on seasoned meat inside crispy taco shells with fresh toppings that add brightness and crunch.
I put this together on a busy weeknight with just ground beef and a seasoning packet and was surprised how much everyone loved it at the table. It quickly became one of those recipes we return to when comfort food hits.
Ingredients
- 12 taco shells: choose hard for crunch or soft for a tender bite
- 1 pound ground beef: or swap ground turkey to lighten the dish
- 1 packet taco seasoning: adds bold spiced flavor pick a good quality brand or mix your own for freshness
- 1 cup water: to simmer and blend the seasoning into the meat
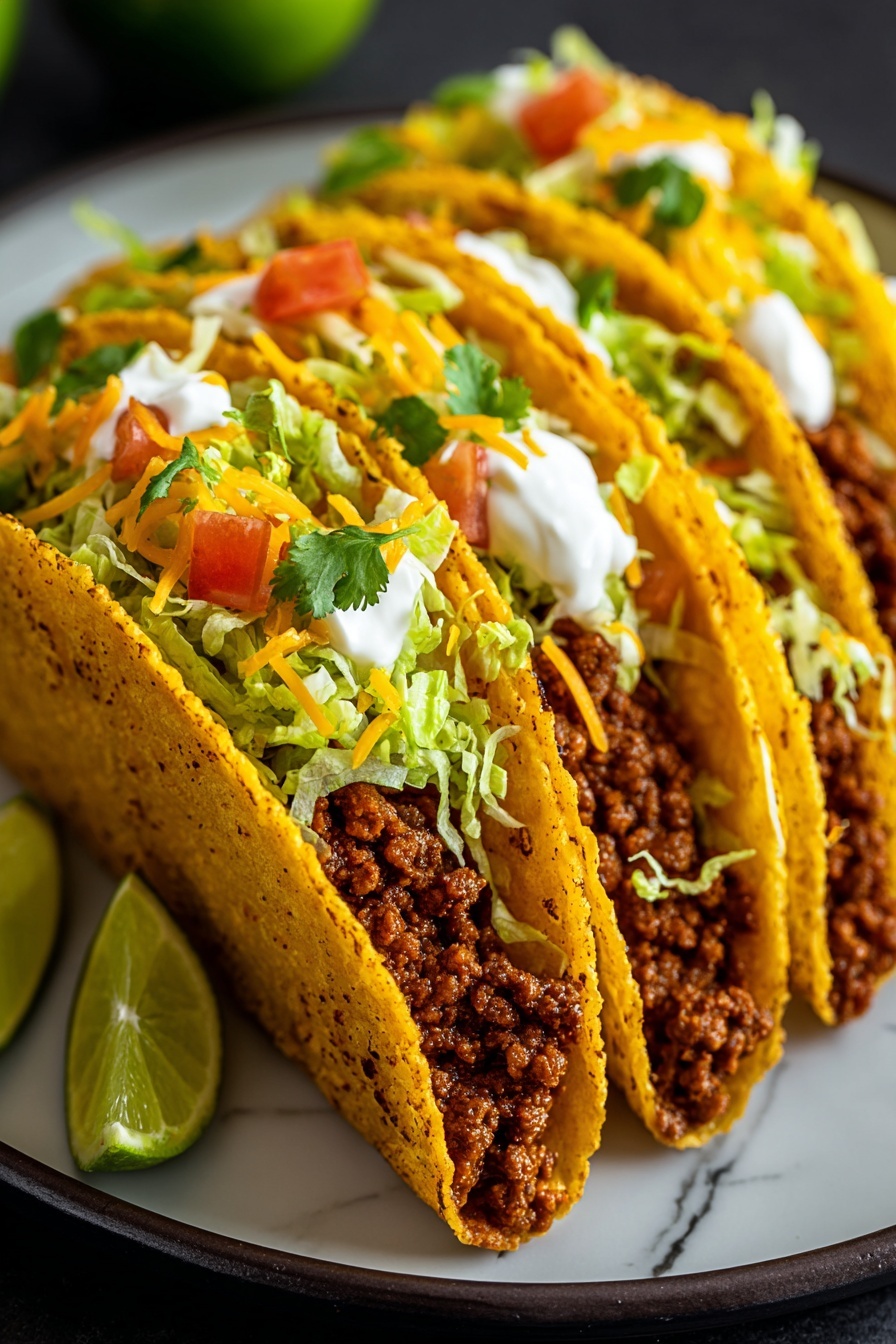
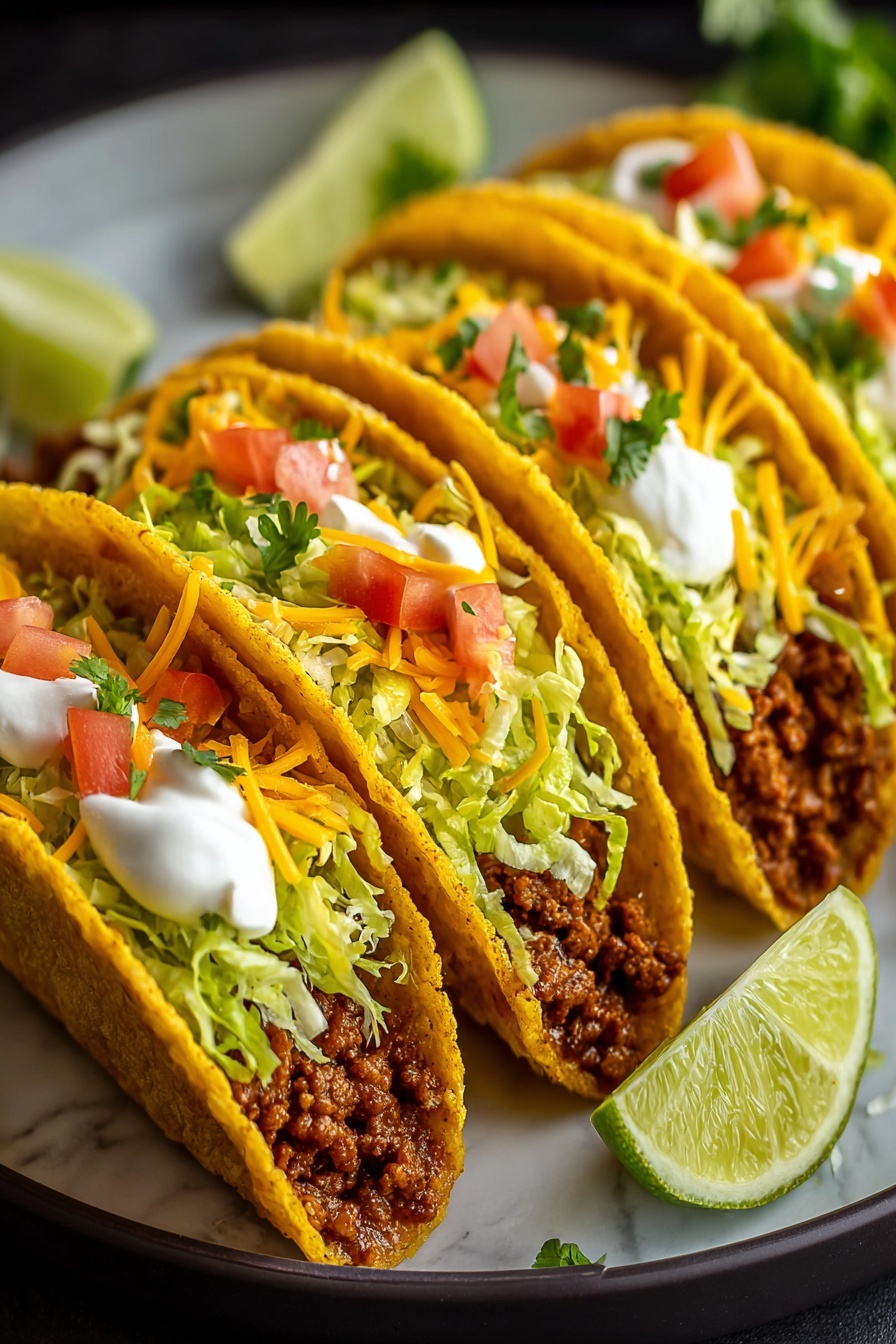
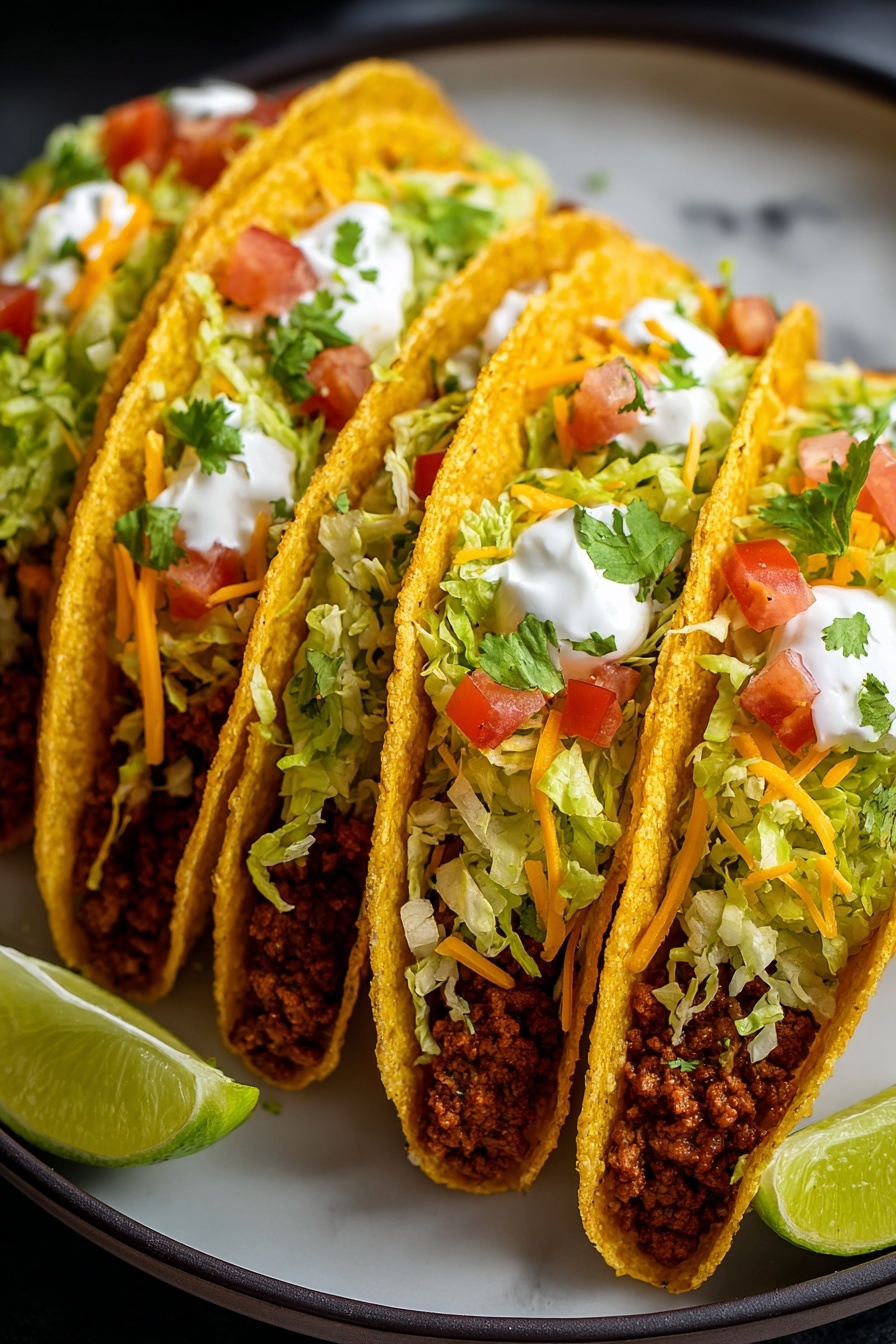
- 2 cups shredded cheese: cheddar or Monterey Jack each melts beautifully for gooey richness
- 1 cup shredded lettuce: brings a cool crisp texture to balance the warmth
- 1 cup diced tomatoes: for fresh juiciness and color
- 1/2 cup sour cream: adds creaminess and a bit of tang for topping
- 1/4 cup sliced olives: optional for a salty bite
- 1/4 cup jalapeños: optional for a spicy kick
- Fresh cilantro: optional for a fragrant herbal finish
Instructions
- Preheat the Oven:
- Set your oven temperature to 350 degrees Fahrenheit. Preheating ensures the tacos bake evenly and the cheese melts to a perfect bubbly consistency.
- Prepare the Taco Filling:
- Heat a skillet over medium heat. Add the ground beef and cook it in pieces, stirring constantly until browned and no longer pink. This usually takes about five to seven minutes. Drain off excess fat to avoid greasiness. Sprinkle the taco seasoning over the meat and pour in one cup of water. Stir well to combine all the spices with the beef and let the mixture simmer gently for about five minutes. This lets the flavors fully develop and the sauce thicken just enough to stick to the meat without being soupy.
- Assemble the Tacos:
- Arrange your hard or soft taco shells in a baking dish so they are standing upright and stable. Use a spoon to divide the seasoned beef mixture evenly into each shell, making sure to fill them well but not overstuff. Next, sprinkle the shredded cheese liberally over the top of the meat in each shell. The cheese layer is key to bringing everything together during baking.
- Bake:
- Carefully place the baking dish into your preheated oven. Let the tacos bake for ten to fifteen minutes. During this time the cheese will melt fully and start to bubble and brown slightly. The heat crisps the shells if you use hard tacos and warms through the soft ones making them tender and pliable.
- Serve:
- Remove the tacos from the oven and allow them to cool just for a minute to avoid burning your mouth. Top with shredded lettuce, diced tomatoes, a few sliced olives or jalapeños if you like the heat. Add a dollop of sour cream on each taco and garnish with cilantro if using. Serve immediately so you enjoy the cheese while it is still gooey and the shell crispy or soft, whichever you chose.
Cheese is definitely my favorite part of this recipe as it adds melt-in-your-mouth comfort that makes these tacos feel like a treat. One family night I forgot to buy lettuce so we piled on extra tomatoes and sour cream and it was just as delicious — that flexibility is why this recipe feels like a reliable friend.
Storage Tips
Refrigerate any leftovers in an airtight container and consume within two days to keep flavors fresh. To reheat place in the oven at 350 degrees until warm and cheese is bubbly again. Avoid microwaving if you want to keep the taco shells crispy.
Ingredient Swaps
Try ground chicken or plant-based crumbles for a different protein experience. Use pepper jack cheese for an extra kick or vegan cheese alternatives to make this dairy free. Black beans can be stirred into the meat mixture for more texture and fiber.
Serving Ideas
Pair these tacos with a fresh side salad or Mexican rice for a fuller meal. Add a squeeze of lime and some avocado slices on the side for vibrant flavors. Offer hot sauce on the table for guests who want an extra layer of spiciness.
Keep taco shells from getting soggy by serving immediately after baking. Do not skip draining the cooked meat to prevent greasy filling. Toast the spices briefly if using homemade seasoning for more depth.
Frequently Asked Recipe Questions
- → What kind of cheese works best for these tacos?
Cheddar and Monterey Jack cheeses are ideal for melting, creating a gooey, flavorful layer on top of the taco filling.
- → Can I use other meats besides ground beef?
Yes, ground turkey or chicken works well and can be seasoned similarly for a lighter alternative.
- → How do I keep the taco shells crispy after baking?
Placing the shells in a baking dish helps them crisp evenly without getting soggy from the filling.
- → Is it possible to make this dish spicier?
Adding jalapeños or increasing the amount of taco seasoning can boost the spice level according to preference.
- → Can I prepare the filling ahead of time?
Yes, the seasoned meat can be cooked in advance and refrigerated, then assembled and baked just before serving.