
 Save
Save
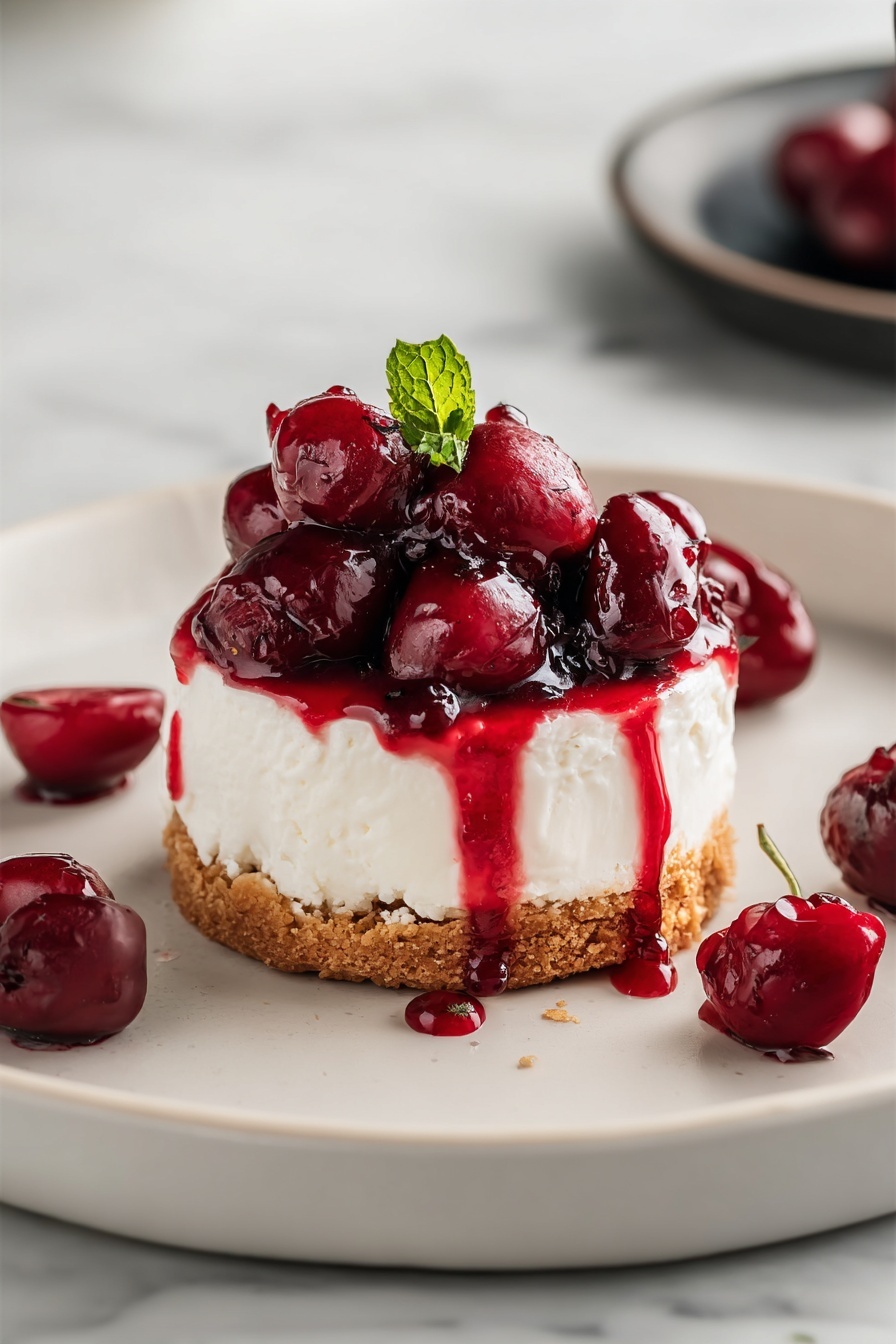
This no bake cherry cheesecake is perfect for those moments when you want a creamy indulgence without turning on the oven. It comes together quickly and looks impressive enough for guests but is simple enough for a weeknight treat.
I always keep the ingredients ready for last minute dessert cravings. It’s become my easy go-to when I want something sweet but light.
Ingredients
- Graham cracker crumbs: create a buttery crunchy crust choose fresh crumbs or crush whole crackers for best texture
- Granulated sugar: adds a touch of sweetness to the crust adjust if your crackers are already sweetened
- Unsalted butter: binds the crumbs and helps form the base use good quality butter for richness
- Cream cheese: provides the creamy body make sure it is softened to avoid lumps
- Powdered sugar: blends smoothly into the filling for gentle sweetness sift if clumped
- Vanilla extract: adds warm depth choose pure extract if possible
- Heavy whipping cream: whipped to stiff peaks lightens the filling and adds fluffy texture
- Cherry pie filling: brings the classic fruity topping opt for a tin with visible fruit chunks for best appearance
Instructions
- Build The Crust:
- In a bowl, mix graham cracker crumbs with granulated sugar and melted unsalted butter until everything holds together when pressed. This step forms the buttery base that contrasts perfectly with the creamy filling. Press roughly two tablespoons of the mixture into the bottom of each serving cup or spread evenly if using a trifle dish. This creates the foundation and should be packed down firmly to hold shape.
- Prepare The Cheesecake Filling:
- Using a large bowl, beat softened cream cheese until smooth and free of lumps. Add powdered sugar and vanilla extract and continue beating until fully incorporated. This mixture forms the rich and tangy core of your cheesecake.
- Whip The Cream:
- In a separate cold bowl, whip heavy cream until stiff peaks form. This aerates the cream and adds lightness to the dense cream cheese mixture.
- Combine Filling Components:
- Gently fold the whipped cream into the cream cheese mixture with a spatula. Work carefully to maintain the volume of the whipped cream while distributing it evenly. This step ensures a creamy but light filling.
- Assemble The Cheesecake:
- Spoon or pipe the creamy filling over the crust on each serving cup or the trifle base. Use a spoon or spatula to smooth the surface for an even look.
- Add The Cherry Topping:
- Spoon generous amounts of cherry pie filling evenly over the cheesecake layer. This brings bright color, flavor, and the classic cherry cheesecake finish.
- Chill For Best Texture:
- Refrigerate for at least two hours before serving so the filling firms up and the flavors meld together.
The heavy cream is my favorite part because it transforms the dense cream cheese into something light and luscious. One year during the holidays, I made this in little cups and it was the first dessert gone at our family gathering. It brings back happy memories every time I prepare it.
Storage Tips
Keep leftover cheesecake covered tightly in the refrigerator for up to three days. Avoid freezing as the texture of the whipped cream layer can break down and become watery on thawing. If you need to store longer, consider freezing just the crumb base and assembling fresh when ready to serve.
Ingredient Swaps
Greek yogurt can be folded into the cream cheese for tang and lightness but reduce heavy cream to balance texture. You can swap cherry pie filling for fresh cherries tossed with a little sugar and lemon zest if you prefer a fresher fruit topping.
Serving Ideas
Serve with a sprinkle of toasted almonds or chopped pistachios on top for crunch. A drizzle of melted chocolate pairs beautifully with the cherry topping. Offer alongside black coffee or a glass of chilled sparkling water for balance.
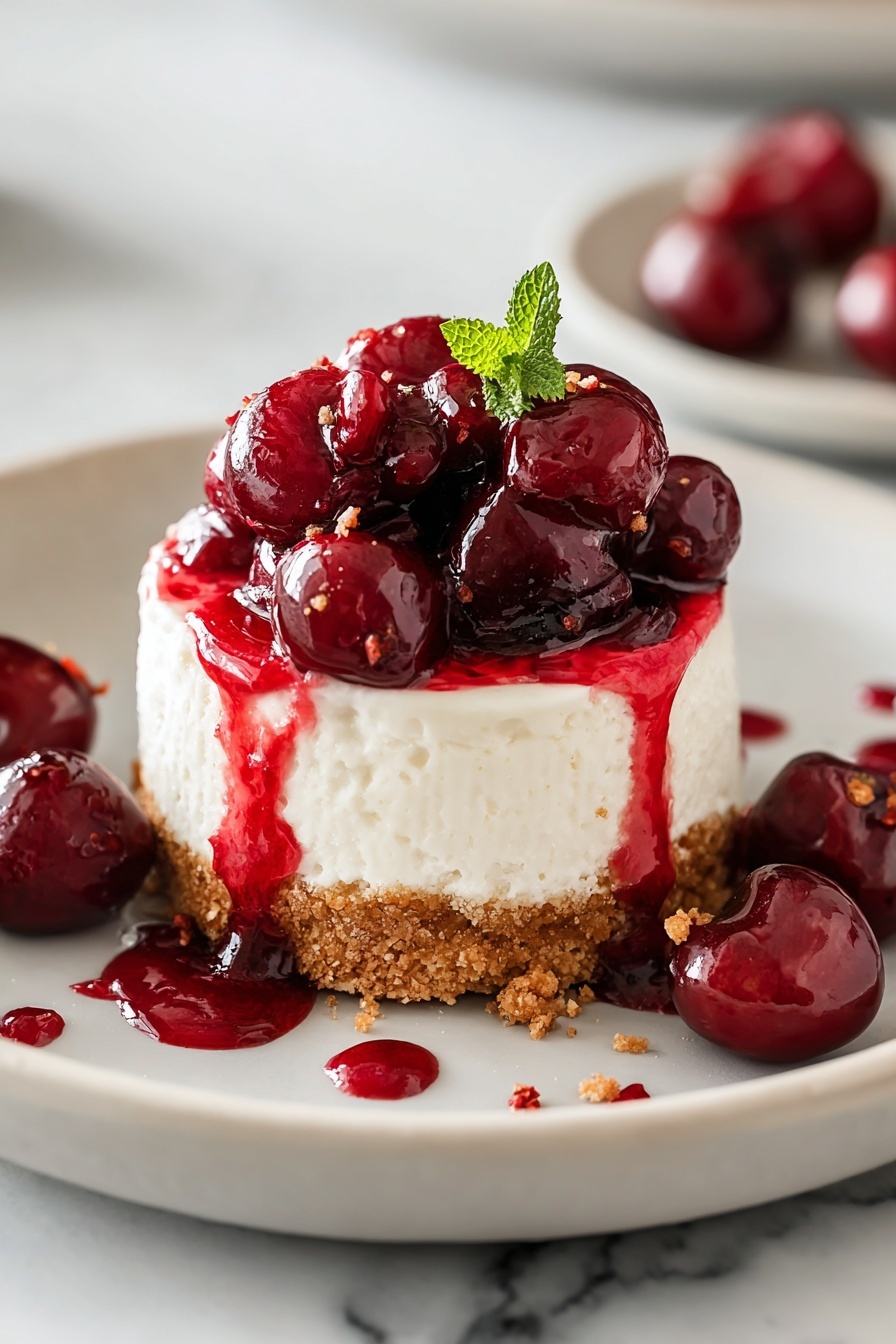
This no bake cherry cheesecake is a quick, delightful treat that’s sure to impress without fuss. Enjoy every creamy bite with the perfect balance of textures and flavors.
Frequently Asked Recipe Questions
- → What type of crust is used in this dessert?
A buttery graham cracker crumb crust mixed with sugar and melted butter forms the base, providing a crunchy contrast to the creamy filling.
- → How do I get the cream cheese mixture smooth?
Beat softened cream cheese thoroughly until smooth, then add powdered sugar and vanilla before folding in whipped heavy cream for a light texture.
- → Can I use fresh cherries instead of canned pie filling?
Fresh cherries can be used but are best cooked down with sugar to achieve the desired jam-like consistency for topping.
- → Is chilling necessary for this dessert?
Yes, chilling for at least two hours allows the filling to set properly and the flavors to meld, enhancing the overall texture.
- → Can this dessert be made ahead for gatherings?
Absolutely, it keeps well refrigerated and can be prepared a day in advance, easing serving on event day.