
 Save
Save
This vegan banana pudding is my favorite easy dessert that feels indulgent but comes together in no time using simple pantry staples. It’s perfect for weekend treat cravings or for bringing to family gatherings when you want something comforting and dairy free.
I remember making this after a friend introduced me to vegan puddings and it quickly became a dessert we requested on repeat. Its creamy texture and nostalgic vibes hit the spot every time.
Ingredients
- Instant vegan vanilla pudding mix: Two boxes are the base and save lots of time. Choose a brand you’ve tested or try the homemade option if you want full control over sweetness and texture.
- Unsweetened non-dairy milk: Like almond, soy or oat works best. I find almond gives the pudding a subtle richness without overpowering the vanilla flavor. Pick the freshest cartons possible to avoid any off-tastes.
- Vegan vanilla wafers: Provide that classic crunch and flavor contrast. Look for ones with simple ingredients or consider making your own if you have time. The 365 brand I used has a good texture.
- Large ripe but firm bananas: Are key for sweetness and softness without becoming mush. The lemon juice is optional but helps stop browning if you’re decorating with banana slices on top.
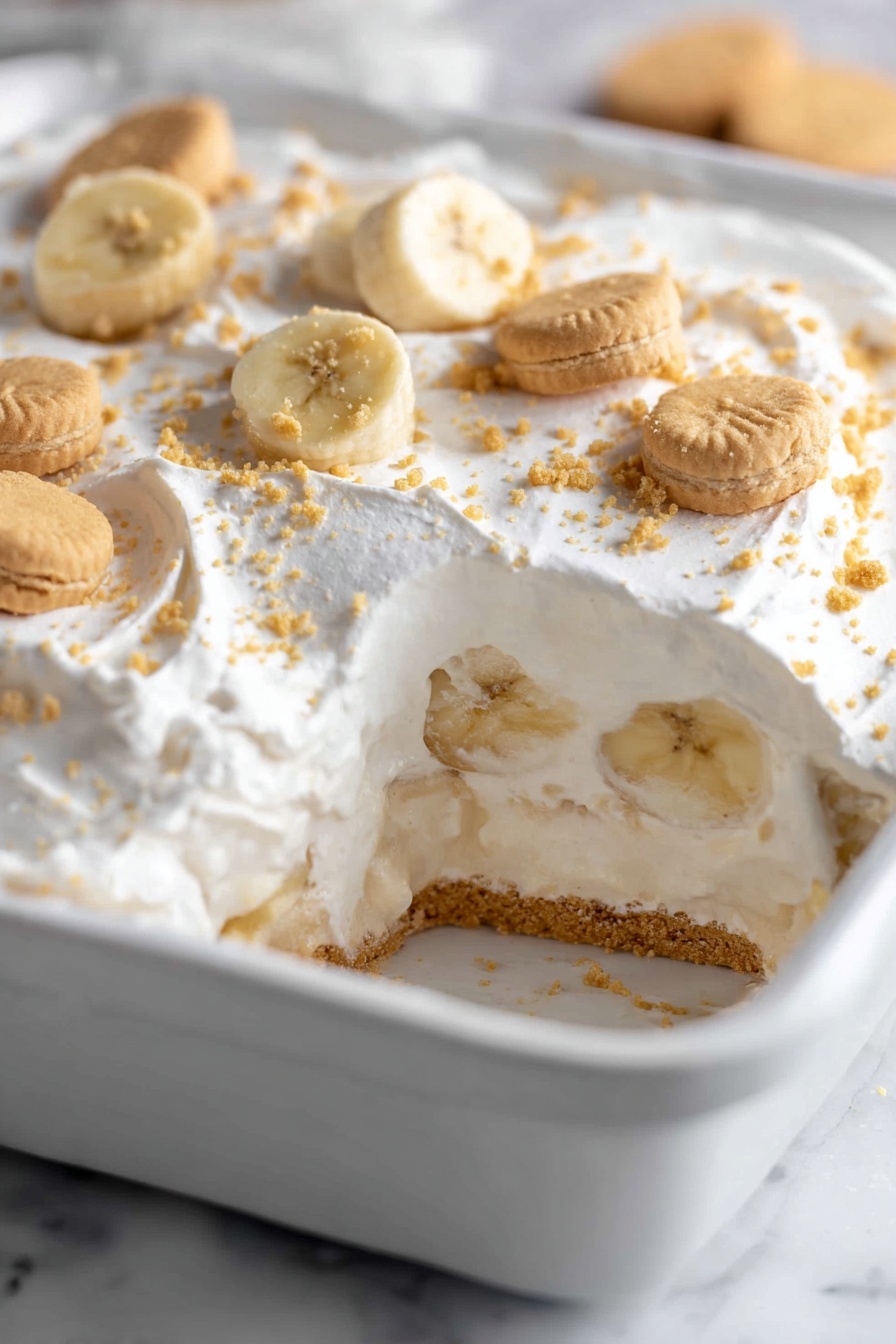
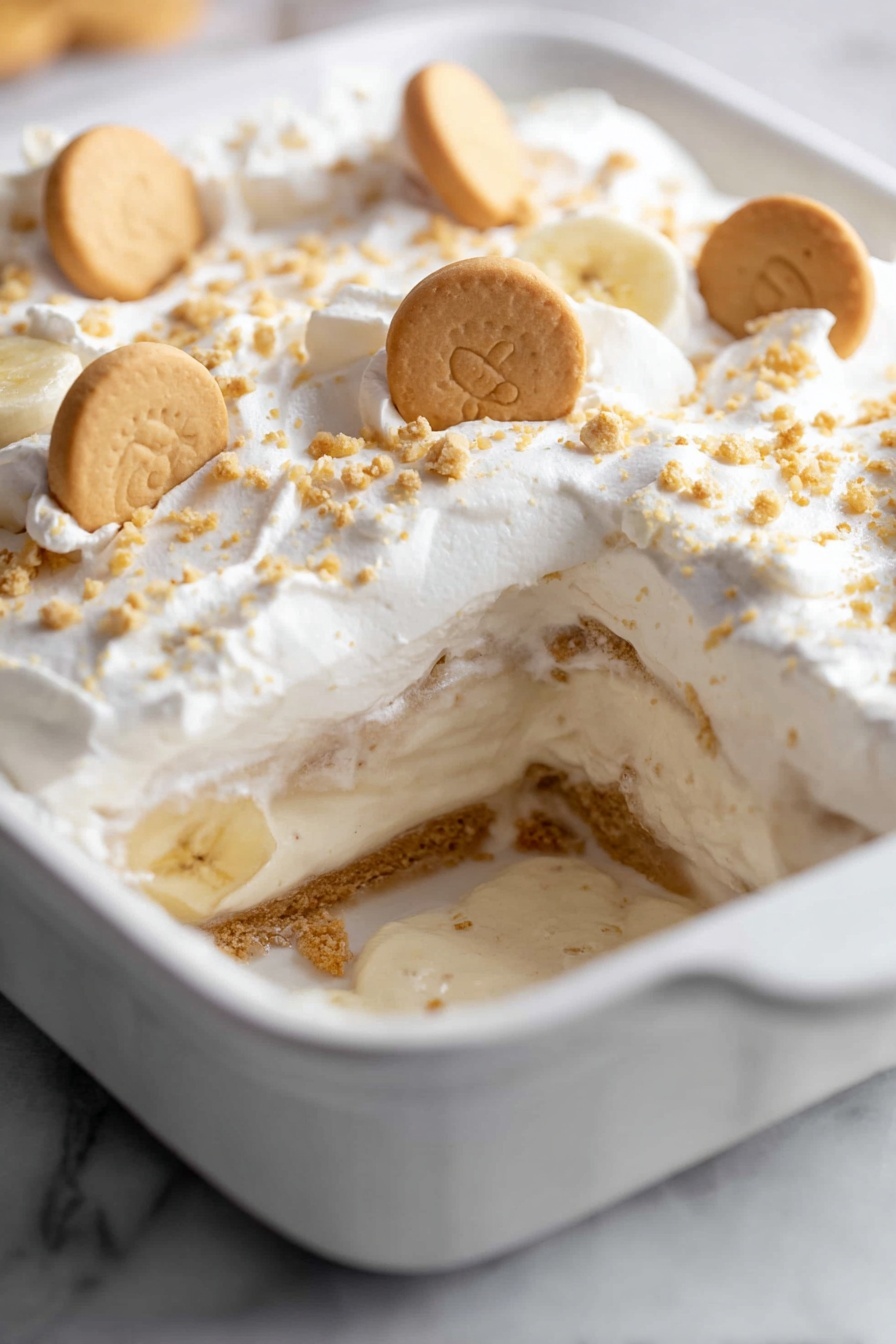
- Dairy-free whipped coconut topping: Adds a fluffy finish and pairs well with the pudding’s creamy texture. You can use store-bought or homemade whipped coconut cream when possible.
Instructions
- Build The Pudding Base:
- Prepare one box of pudding according to package directions. Some brands like Jell-O recommend reducing non-dairy milk slightly to help it set better. Use an electric mixer to whisk the pudding until thickened and soft but not firm. I prefer blending the powder with milk briefly before whipping to avoid clumps. Set the pudding aside.
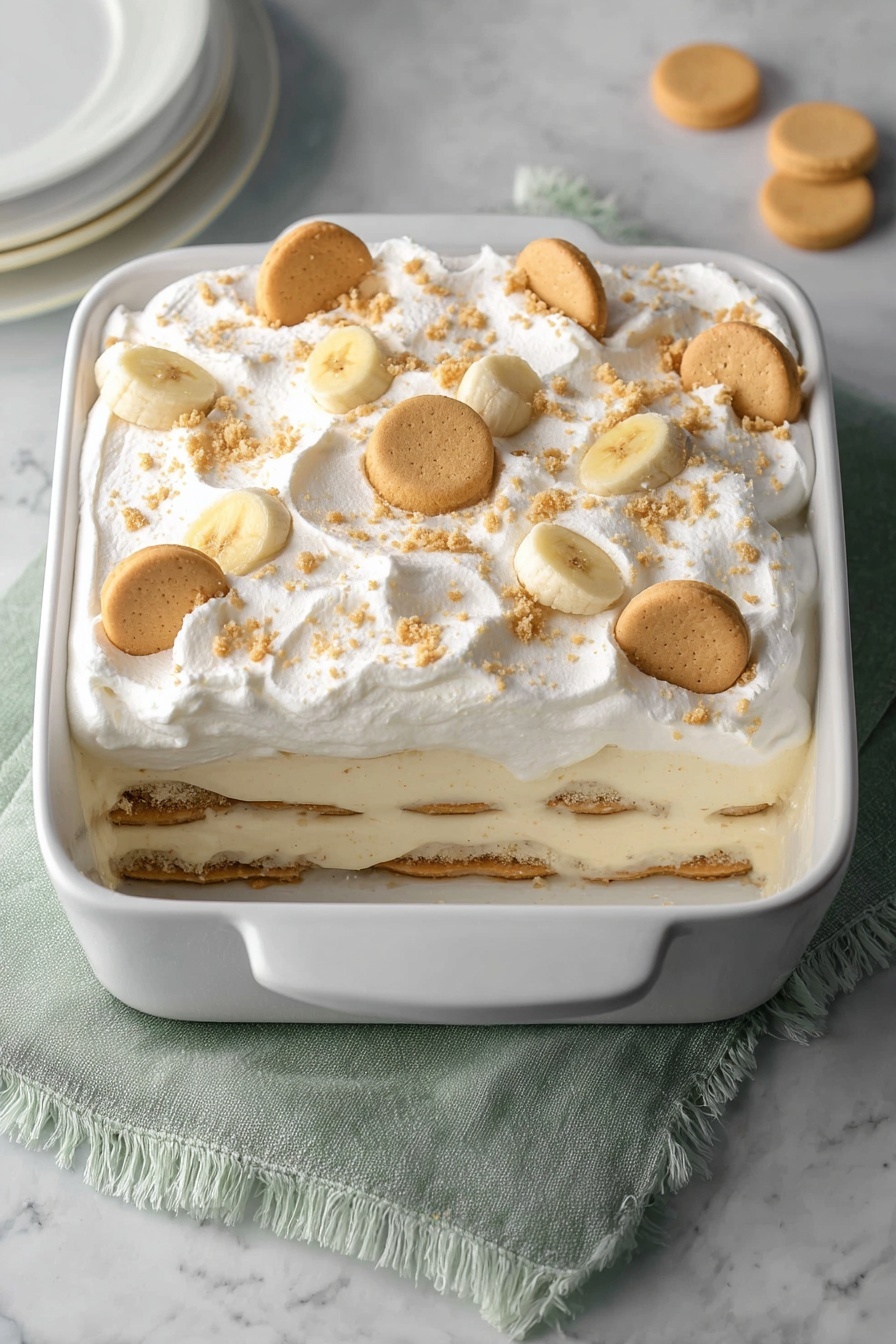
- Layer The First Round:
- Arrange vanilla wafers evenly on the bottom and sides of an 8 or 9 inch square dish. Crumble a few wafers to fill any gaps between whole ones. Slice one banana and make one layer of banana slices on top of the wafers. Completely cover the banana with the prepared pudding, spreading it out to the edges.
- Prepare The Second Pudding Layer:
- Make pudding again with the second box of mix following the same steps. This ensures a fresh creamy layer without dry spots.
- Assemble The Final Layers:
- Repeat the layering with wafers, banana slices, and the second batch of pudding. Smooth the top carefully so all bananas are covered well.
- Chill And Garnish:
- Refrigerate the pudding dish for at least three hours uncovered or loosely covered to let it set perfectly. Before serving, add a generous layer of whipped coconut cream on top. If decorating with banana slices, toss them lightly in lemon juice to keep their color bright. Finally, crumble some vanilla wafers on top for a delightful crunch.
My favorite part is the creamy pudding contrasted with the crunchy wafers. The first time I made this for a summer potluck it vanished before I could get a second slice. It reminds me of childhood desserts but has a fresh twist with the coconut whipped topping.
Storage Tips
Store any leftovers covered tightly in the refrigerator for up to three days. The pudding may soften the wafers over time, so for best texture enjoy within a day or two. You can refresh by adding more crushed wafers on top before serving.
Ingredient Swaps
Use any instant vegan pudding mix you trust or try making your own pudding from scratch with cornstarch and vanilla extract. Try different non-dairy milks like cashew or coconut for subtle flavor changes but keep them unsweetened to control sweetness. If vegan vanilla wafers are unavailable, graham crackers or thin crispy cookies can work as substitutes.
Serving Ideas
Serve this pudding in individual glasses for a pretty presentation or as a layered parfait with fresh berries. Top with toasted coconut flakes or chopped nuts for extra texture. For a festive touch, sprinkle cinnamon or nutmeg on top with the whipped cream.
This pudding is easy to make and brings all the comfort of a classic dessert in a vegan version you can enjoy anytime.
Frequently Asked Recipe Questions
- → What types of non-dairy milk work best?
Almond milk lends the creamiest texture and mild flavor, but soy or oat milk also blend well with the pudding mix.
- → Can I prepare this dessert ahead of time?
Yes, layering and chilling for at least 3 hours helps the pudding set and flavors meld beautifully.
- → How do I prevent bananas from browning on top?
Toss banana slices with a little lemon juice before placing them on top to maintain their fresh appearance.
- → Is it possible to make homemade vegan vanilla pudding?
Absolutely, using plant-based milk, sweetener, vanilla extract, and a thickening agent like cornstarch, you can craft pudding from scratch.
- → What alternatives exist for vegan vanilla wafers?
If unavailable, use other vegan-friendly cookies or biscuits with a neutral vanilla flavor and crunchy texture.