
 Save
Save
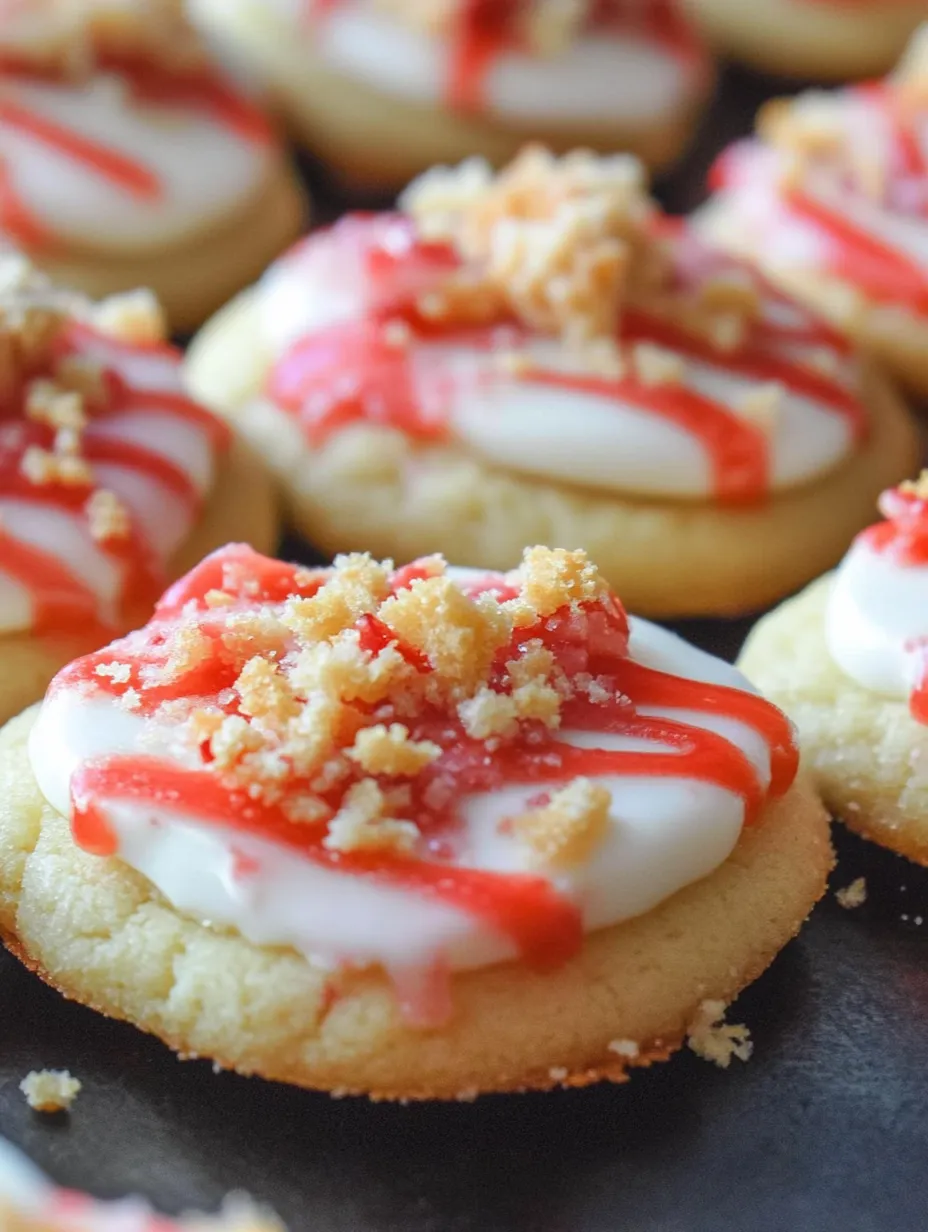
The way those soft sugar cookies melt with just a hint of strawberry always reminds me of lazy spring afternoons spent picking berries with my mom. She’d hum old tunes while we baked, and the kitchen would fill with warmth and sugary sweetness long before the cookies even came out of the oven. This recipe came about one day when I wanted to bring a little sunshine into winter — swapping plain sugar cookies for something that tasted like a berry-laden shortcake, but easier to share and gift.
I first tried a simple glazed sugar cookie years ago, but adding the strawberry shortcake crumbs was a happy accident. I had leftover biscuit crumbs from a dessert experiment and thought, why not sprinkle those on top? It took these cookies from ordinary to something magical, like a handheld strawberry shortcake.
Essential Ingredients
- Butter (3/4 cup, softened): The backbone for tender, rich cookies; aim for unsalted to control your salt levels.
- Sugar (1 1/2 cups): Sweetens and helps create a light texture; I prefer granulated for that classic sugar cookie bite.
- Eggs (2 large): Bind everything together and add moisture; room temperature is best for even mixing.
- Vanilla extract (2 teaspoons): Lends warm, aromatic notes that deepen the flavor; pure vanilla is a game changer.
- All-purpose flour (2 3/4 cups): Provides structure; sift it to avoid lumps and ensure a soft crumb.
- Salt (1/2 teaspoon): Balances sweetness and enhances flavor; a fine sea salt works well.
- Baking powder (1/2 teaspoon): Gives a gentle lift for chewy edges without the toughness.
- Confectioner’s sugar (4 cups): For the glaze’s silky smooth finish; pick a fresh bag free from clumps.
- Milk (3 tablespoons): Bridges the sugar and water, making the glaze spreadable; whole milk adds richness.
- Pink food colouring: Just enough for a soft blush that suggests strawberry but keeps the cookies delicate.
- Strawberry Shortcake Crumbs (1 1/2 cups): Crunchy, buttery topping that mimics shortcake biscuits; make these fresh or use store-bought for convenience.
A good tip when shopping? Butter should smell fresh and feel pliable but not oily. For vanilla, check the label carefully—pure extract always beats imitation. Flour should be stored in a cool, dry place, especially if you’re not baking frequently.
Cooking Process
- Building the Base:
- Cream the butter and sugar until the mixture is pale and fluffy. This step traps air, making the cookies tender and light. When done right, the dough feels soft but holds its shape well.
- Binding with Care:
- Add eggs one at a time, fully incorporating each before moving to the next. This slows the process just enough to keep everything emulsified.
- Powder Power:
- Sift in your flour, salt, and baking powder. Sifting prevents clumps and blends the leavening agent evenly, so cookies bake up beautifully consistent.
- Shaping the Stars:
- Roll dough into balls and flatten to a quarter-inch thickness; a glass bottom works wonders for an even press. This method ensures delicate edges and a perfect chew.
- The Golden Moment:
- Bake for 10 minutes until just turning golden at the edges but still soft in the center. This keeps the cookies tender and not overdone.
- Glazing Grace:
- Mix confectioner’s sugar with milk to a thin, pourable glaze. Dividing and tinting the glaze adds a festive look, while drizzling instead of spreading lends a delicate finish.
- The Final Flourish:
- Sprinkle the strawberry shortcake crumbs immediately after glazing to lock in that crunch and burst of buttery sweetness.
My favorite variation is swapping out vanilla for almond extract, which adds a lovely, nutty depth that pairs beautifully with the strawberry crumbs. One time I forgot to let the cookies cool before glazing, and the frosting melted into puddles, teaching me the patience that baking demands but also inspiring a happy accident: the glaze dissolved just enough to soak in, softening the cookie edges in a way I now love.
Make-Ahead Strategies
Bake the cookies and store them in an airtight container for up to 3 days before glazing. If you want to prepare even earlier, freeze the baked cookies for up to 2 weeks, then thaw completely before frosting. This makes gift-giving or party prep a breeze.
Flavor Variations
Try swapping the strawberry crumbs for lemon shortbread crumbs or crushed pistachios for a nutty twist. You can even mix some freeze-dried raspberries into the glaze for a tart pop of berry flavor.
Kitchen Tool Recommendations
A mixer with a paddle attachment cuts creaming time dramatically, but a sturdy hand whisk will do in a pinch. Baking racks and silicone mats ensure even baking and easy cleanup, while a small zip-top bag for drizzling glaze gives you control over your design.
Cooking Secrets
- Don’t rush the creaming step; fluffy butter and sugar form the structure that makes these cookies light, not dense.
- Press cookies evenly and thin enough so they bake uniformly—thicker means chewy centers, thinner means crisp edges.
- Frost only completely cooled cookies to prevent glaze meltdown and preserve crisp shortcake crumbs.

Frequently Asked Recipe Questions
- → How do I achieve a soft yet firm cookie texture?
Beat the butter and sugar until creamy before adding eggs and vanilla, then mix in dry ingredients until just combined. Flatten dough balls evenly before baking to ensure they bake uniformly with a tender interior and slight crispness on the edges.
- → What is the best way to drizzle the glaze evenly?
Use a small bag with a cut corner to zigzag the frosting across the cookies gently. This technique provides control and neat lines without overwhelming the cookie.
- → Can I prepare the cookies ahead of time?
Yes, bake and cool the cookies completely before glazing and adding crumbs. The glaze should dry fully before storing to avoid mess and maintain freshness.
- → How can I make the strawberry shortcake crumbs at home?
Use crushed shortcake biscuits or bake small shortcake pieces until crisp, then crumble them finely to sprinkle on top for added texture and flavor.
- → What variations can be done for the glaze color?
Adjust the amount of food coloring in the glaze to achieve your desired pink shade or try natural colorings like beet juice for a subtle tint.