
 Save Pin
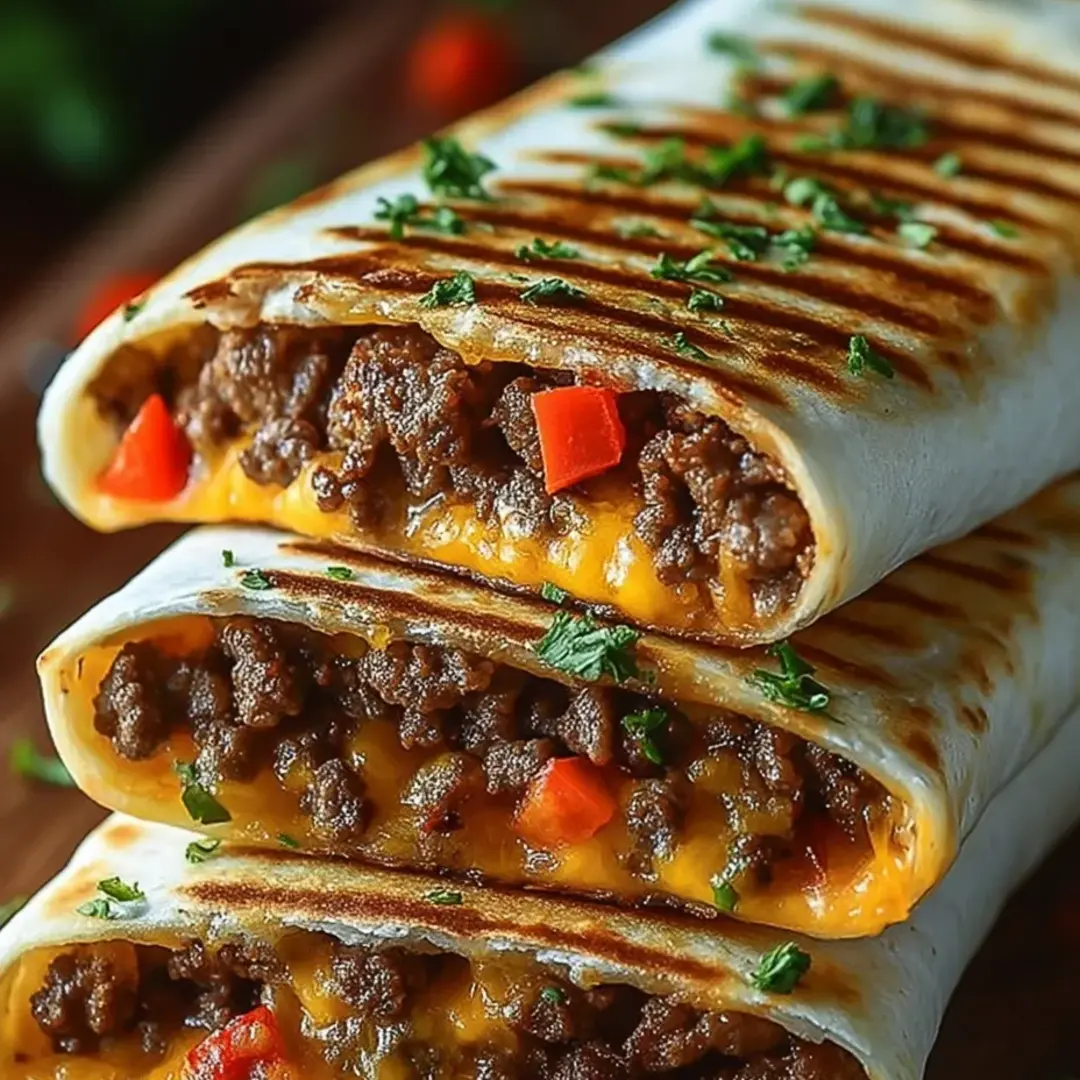
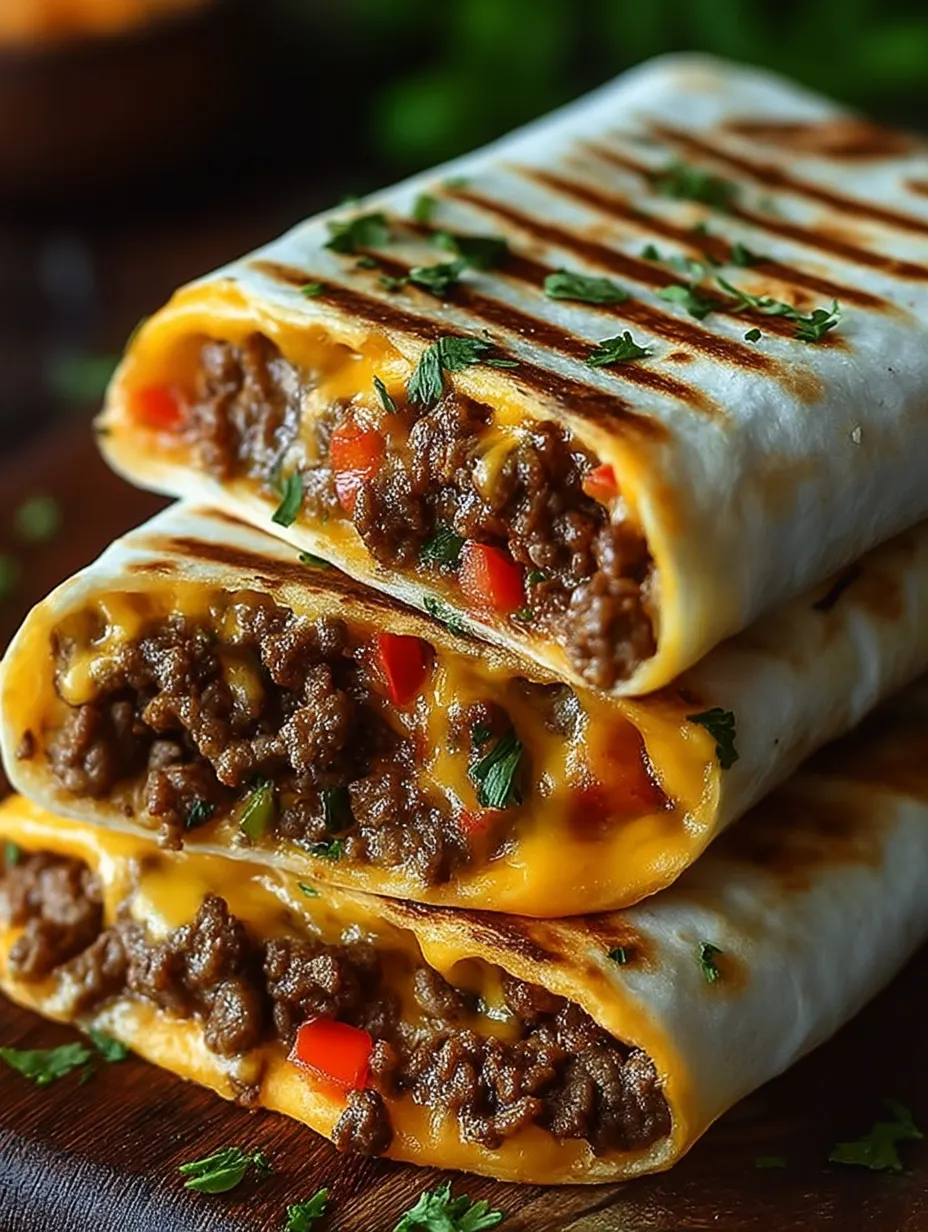
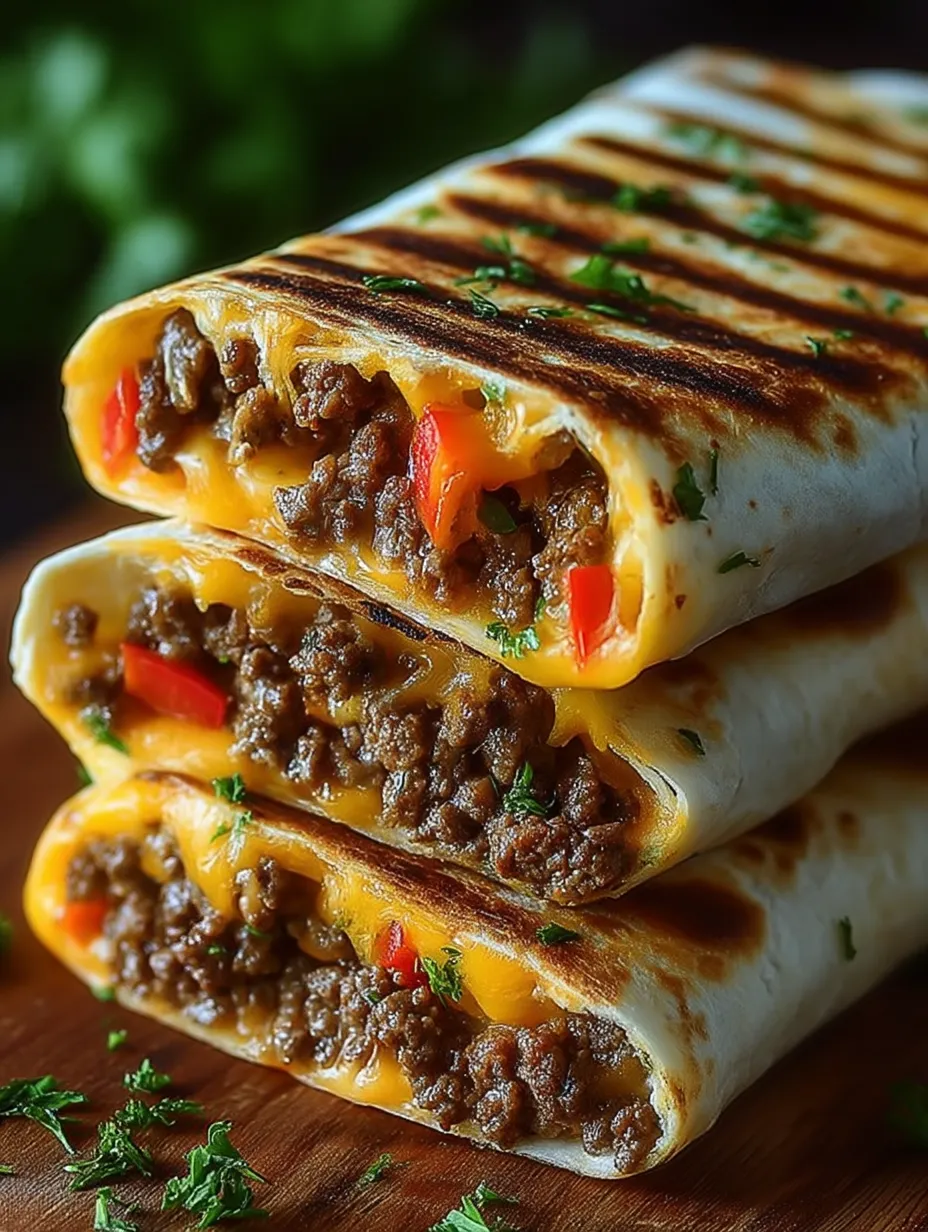
This filling Toasted Burger Wrap combines everything you love about a traditional burger in a handy wrap that's just right for busy evenings or laid-back get-togethers. When you mix flavorful seasoned beef with gooey cheese and crisp, fresh toppings, you'll get an amazing taste that'll win over even the biggest burger lovers out there.
I came up with these wraps when the kids wanted burgers but I needed something less drippy for our movie watching. These days they actually ask for these crunchy, cheesy bundles more often than they want regular burgers.
Ingredients
- Ground beef: Get the 80/20 mix for just the right amount of juicy flavor without ending up too greasy
- Salt and pepper: Bring out the meat's natural taste and round out the other spices
- Garlic powder and onion powder: Give lots of flavor without chunks of the real thing
- Worcestershire sauce: Adds that special burger taste that makes these wraps truly feel like a cheeseburger
- Ketchup: Brings a touch of sweet and tangy while helping everything stick together
- Large flour tortillas: The best choice since they give you plenty of room to stuff and roll
- Shredded cheese: Turns wonderfully melty when heated up
- Diced tomatoes: Add juiciness and freshness against the rich meat
- Red onions: Give each bite a zingy crunch
- Pickles: Bring that classic burger tang and different texture
- Mayonnaise or burger sauce: Makes everything creamy and helps the wrap stay closed during cooking
Step-by-Step Instructions
- Cook the Ground Beef:
- Get your pan hot over medium heat - you should feel warmth when you hold your hand above it. Toss in the ground beef and start breaking it up with a wooden spoon or chopper tool. Keep cooking and breaking it apart for 5-7 minutes until you don't see any pink. Let some spots get nice and brown for extra flavor.
- Season the Beef:
- After it's browned, tip the pan and scoop out the extra grease with a spoon. Put it back on the heat and mix in salt, pepper, garlic powder, onion powder, Worcestershire sauce, and ketchup. Mix everything really well so the seasonings coat all the meat. Let it bubble gently for 1-2 minutes so the flavors come together. Take it off the heat and set it aside.
- Prepare the Tortillas:
- Put each tortilla on a clean counter. Smear about half a tablespoon of mayo or burger sauce all over it. This adds flavor but also stops the tortilla from getting soggy from all the fillings.
- Assemble the Wraps:
- Put about a quarter cup of shredded cheese in a line down the middle of each tortilla, leaving about two inches free on each side. The cheese goes first so it melts properly when cooked. Spoon equal amounts of the seasoned beef on top of the cheese in a neat rectangle. Add diced tomatoes, red onions, and pickles evenly across the meat.
- Fold and Roll:
- Fold both sides of the tortilla over the fillings, then roll it up from the bottom, making sure to keep the sides tucked in as you go. You want a tight package with nothing falling out. Press lightly to seal it.
- Grill to Perfection:
- Warm up a clean pan over medium-low heat. Add butter or spray with cooking spray so nothing sticks. Put the wraps down with the seam side down first to seal them closed. Cook for 2-3 minutes until they're golden brown, then carefully flip and cook the other side just as long. When they're done right, they'll have a crispy outside with nice grill marks and the cheese inside will be completely melted.
 Save Pin
Worcestershire sauce is really the magic touch in this dish. My grandma always put it in her burgers and it gives that special savory taste that makes people wonder what your trick is. I can still picture her adding a splash to her meat mixture, and now when my kids see that bottle come out, they know burger wraps are coming soon.
Clean Burger Alternative
These wraps give you all the burger goodness without the usual mess. The tortilla keeps everything inside so you don't get drippy sauces or toppings falling all over. That makes them great for eating during busy sports nights, in the car, or at parties where people are walking around. They're also perfect for lunchboxes or picnics since they stay together so well.
Storage and Reheating
If you have leftovers, they'll stay good in the fridge for up to three days if you wrap them tightly in foil or put them in airtight containers. The best way to reheat them is in a dry pan over medium-low heat for about 3 minutes on each side to get the outside crispy again. You can also use an air fryer at 350°F for 5 minutes for extra crispiness. Don't use the microwave though - it'll make the tortillas all soggy.
Perfect Pairings
These wraps are filling by themselves, but they go great with easy sides too. Try them with sweet potato fries, a simple green salad, or some corn chips and fresh salsa. For dipping, small bowls of ketchup, ranch, or extra burger sauce are great. In summer, I love serving them with juicy watermelon slices or a quick coleslaw to make a complete meal without much cooking time.
Make It Your Own
The basic recipe works great, but you can totally change it up however you want. Try adding bacon bits, chunks of avocado, or sliced jalapeños for more flavor. You can use ground turkey or plant-based meat if you want something lighter. Switch up your cheese - try pepper jack for some heat or blue cheese for something rich and bold. My family loves when I set up a make-your-own wrap bar where everyone picks their own fillings before I grill them all up.
 Save Pin
Common Questions
- → Can I swap out the flour tortillas for something else?
Sure thing! Try corn, whole wheat, spinach wraps, or gluten-free options instead of regular flour tortillas.
- → Which cheese tastes best in these wraps?
Cheddar works great, but feel free to try a combo with some gooey mozzarella, spicy pepper jack, or any cheese that gets nice and melty.
- → Can I get these ready beforehand?
You can put everything together and keep them in your fridge for up to a day, then just grill them when you're ready to eat.
- → Got any meat-free filling ideas?
For sure! Swap out the beef for veggie crumbles or cooked lentils with the same seasonings.
- → How do I stop my wraps from opening while cooking?
Roll them up really tight and start cooking with the folded edge down to help them stay closed.