
 Save Pin
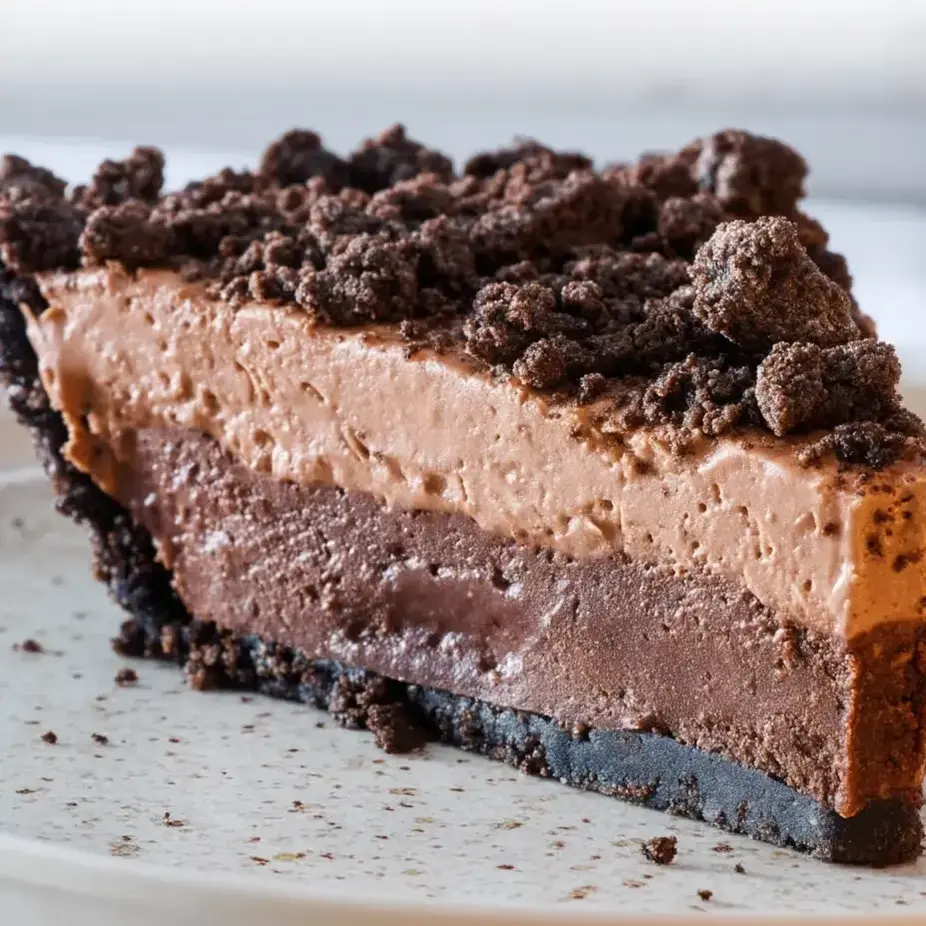
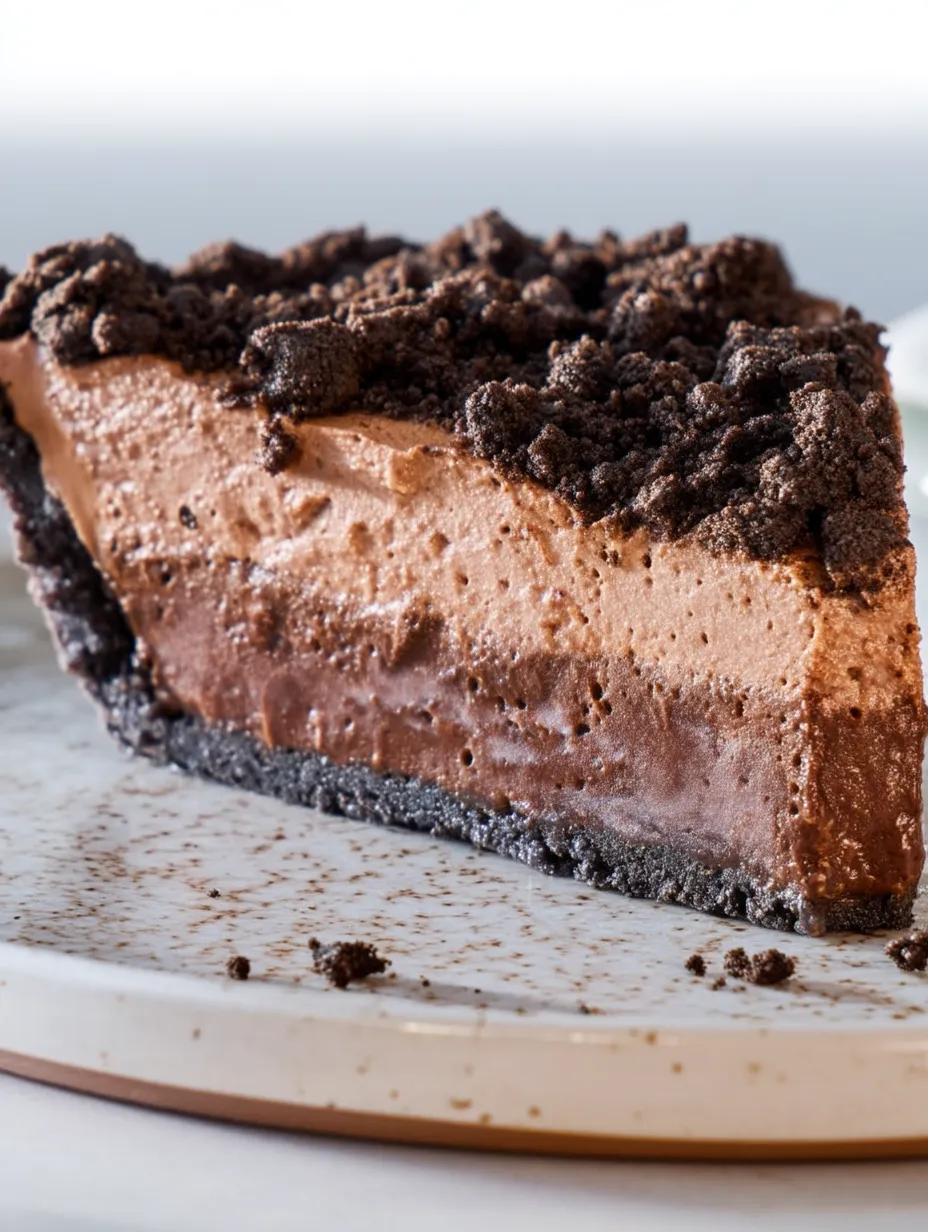
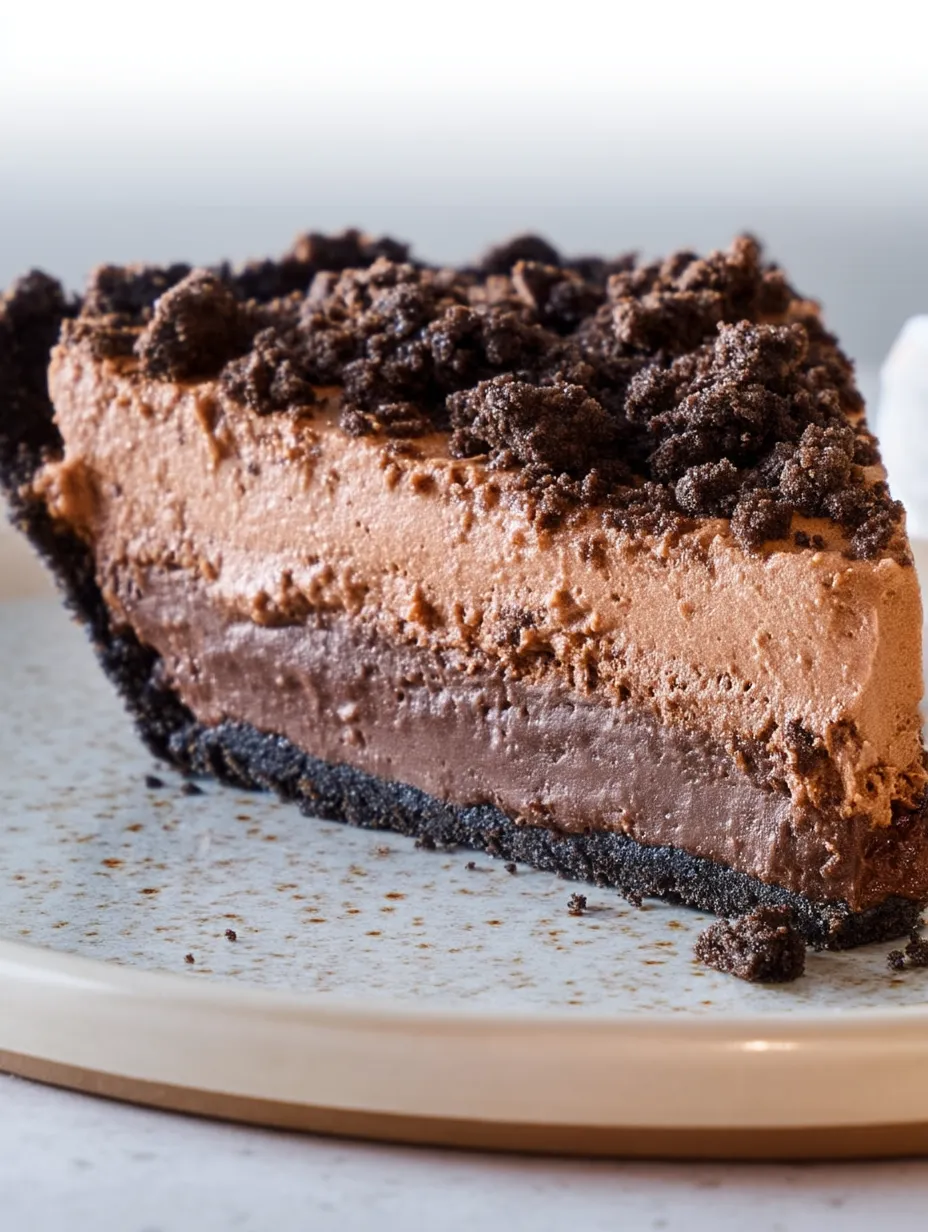
My go-to showstopper has always been this indulgent Mississippi Mud Pie. The triple-layer chocolate creation sitting on an Oreo base turns everyday dinners into memorable celebrations that guests talk about for weeks.
I whipped up this Mississippi Mud Pie during our first year of marriage for my husband's birthday. One taste and his face lit up – he immediately announced it should become our family's signature celebration sweet. Fast forward a decade and it still shows up whenever we're marking something important.
Ingredients
- Oreo cookies: they work double duty as the base and garnish, giving you that iconic cookie crunch experience
- Bittersweet chocolate: forms a deep, fudgy brownie section that isn't overly sweet
- Milk chocolate: creates the silky mousse component that sits perfectly between the other chocolate elements
- Heavy cream: gets whipped up to make the mousse incredibly fluffy and smooth
- Dark brown sugar: brings out those classic Southern molasses undertones
Step-by-Step Instructions
- Prepare the Crust:
- Crush Oreos to fine crumbs and mix with melted butter until it looks like wet sand. Pack it firmly into your pie dish and bake until you can smell it. That wonderful aroma tells you the cookies have released their oils, making your chocolate base even better.
- Create the Brownie Layer:
- Combine melted chocolate with butter and oil until smooth. The oil keeps everything fudgy even after cooling in the fridge. Gently mix in the egg-sugar blend, then add flour just enough to combine – don't overmix or you'll end up with tough brownies. Bake until just the edges set but the middle stays slightly gooey.
- Prepare the Crunchy Topping:
- Break Oreos into chunks instead of grinding them fine for better texture. Mix with cocoa and butter to form clusters that'll bake into crunchy bits, adding interest to every bite. Bake till fragrant, giving them a stir halfway through for even cooking.
- Craft the Chocolate Mousse:
- Watch your temperatures carefully here. Your melted chocolate needs to be exactly between 90-100°F when you mix it with the whipped cream. Too hot and it'll collapse your cream. Use gentle figure-eight motions when folding everything together to keep all those air bubbles that make mousse so light.
 Save Pin
I learned the hard way about getting the mousse just right. After ruining batch after batch by mixing hot chocolate with my cream, I finally bought a cooking thermometer. That simple kitchen tool instantly took my desserts from homemade-looking to restaurant-quality.
Make-Ahead Options
This pie actually gets better after spending time in the fridge. All the flavors start to mingle and develop as it sits, so making it a full day before your party works perfectly. The brownie part gets even more fudgy and the mousse firms up beautifully during this rest time. Just wait to add the crunchy bits until a few hours before you'll serve it so they don't get soggy.
 Save Pin
Serving Suggestions
This pie tastes best when it's cool but not straight-from-the-fridge cold. Take it out about 20 minutes before you plan to eat it so the flavors can wake up. Add a spoonful of barely sweetened whipped cream on top for a nice color contrast. Want to make it extra fancy? Sprinkle some cocoa powder on the plate and toss on a few fresh raspberries or mint leaves to pop against all that chocolate.
Origin Story
This sweet treat comes from the South, born near the Mississippi River. It got its name because it looks like the dark, rich mud found along the riverbanks. Old-school versions were simple chocolate cakes topped with marshmallows, but this fancier layered version keeps the spirit while adding some sophistication. Families across the South have handed down their own versions for years, often bringing it out for Sunday dinners and holidays as a way to welcome guests.
Troubleshooting Tips
- If your mousse looks grainy:
- Your chocolate was probably too hot when you mixed it with the cream. Always let it cool to the right temperature range first.
- For neat slices:
- Run your knife under hot water and wipe it dry between cuts.
- The brownie part should stay a bit gooey:
- If you cook it too long, you won't notice the difference between the layers.
Common Questions
- → What makes Mississippi mud pie unique?
The magic of mud pie comes from its triple chocolate punch. You get three different textures in one dessert with the crumbly cookie bottom, dense brownie middle, and light mousse top layer.
- → Can I use a premade crust for this dessert?
Store-bought Oreo crusts work just fine when you're in a hurry, though making your own gives you better flavor and a fresher crunch.
- → How do I ensure the mousse layer is fluffy?
Use super cold cream and fold everything together with a light touch to keep all those tiny air bubbles intact for fluffy mousse.
- → How long does the pie need to chill?
Let it hang out in the fridge for at least 3-4 hours, but leaving it overnight works even better for the perfect texture.
- → Can I make this pie ahead of time?
Making it a day early is actually ideal. The flavors mingle and get even tastier while it sets up nicely in the fridge.
- → How do I store Mississippi mud pie?
Pop it in the fridge wrapped in plastic or in a container with a lid. It'll stay good for about 3-4 days, though it rarely lasts that long.