
 Save Pin
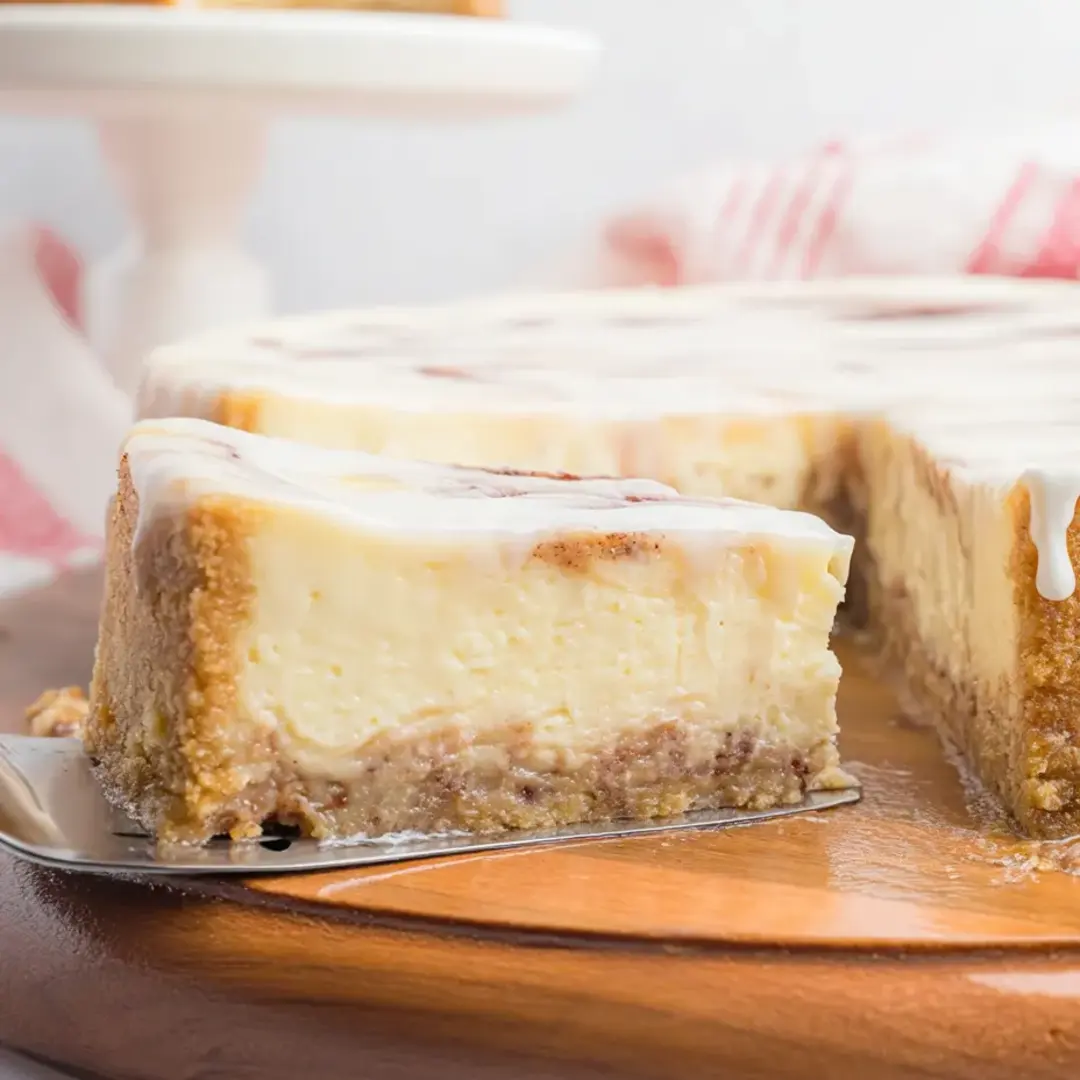
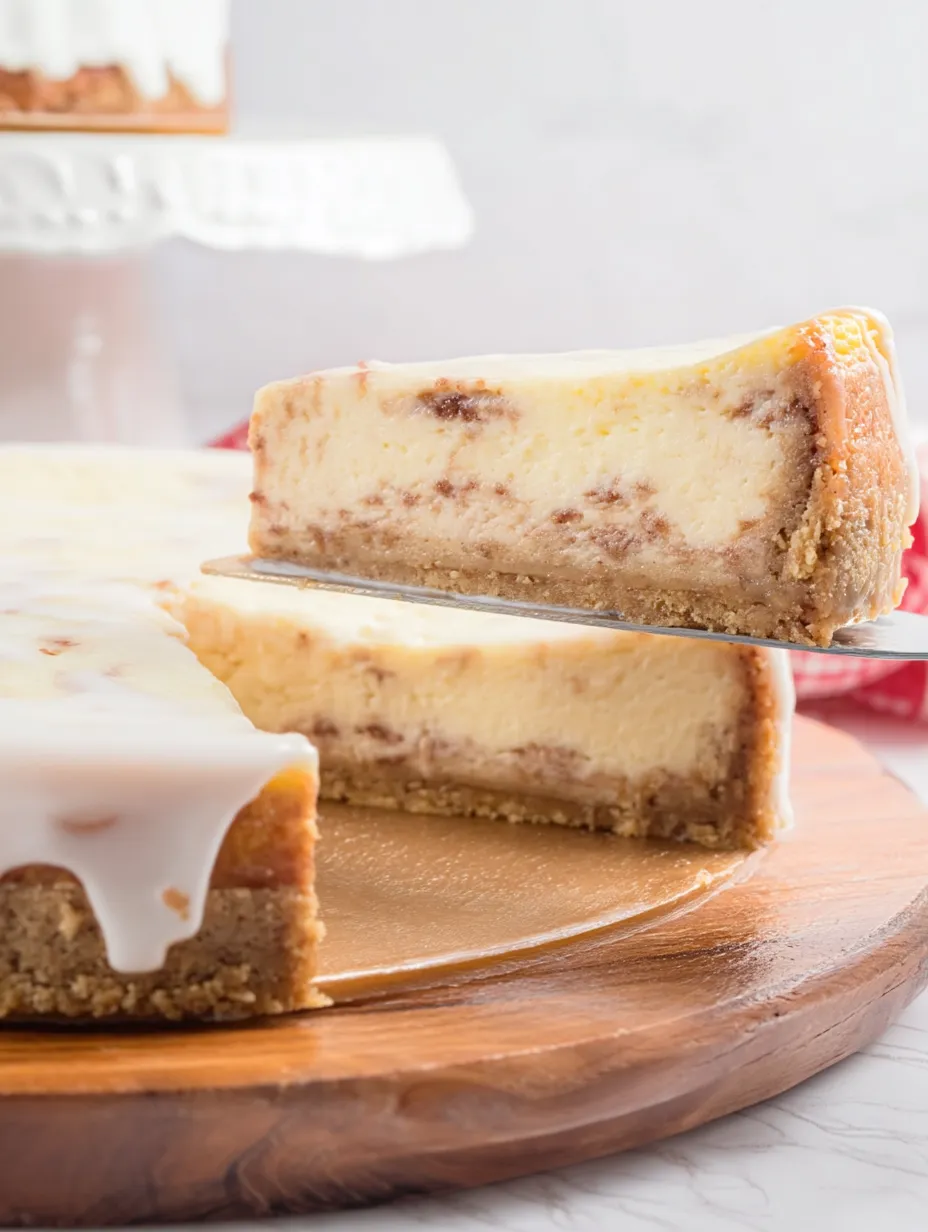
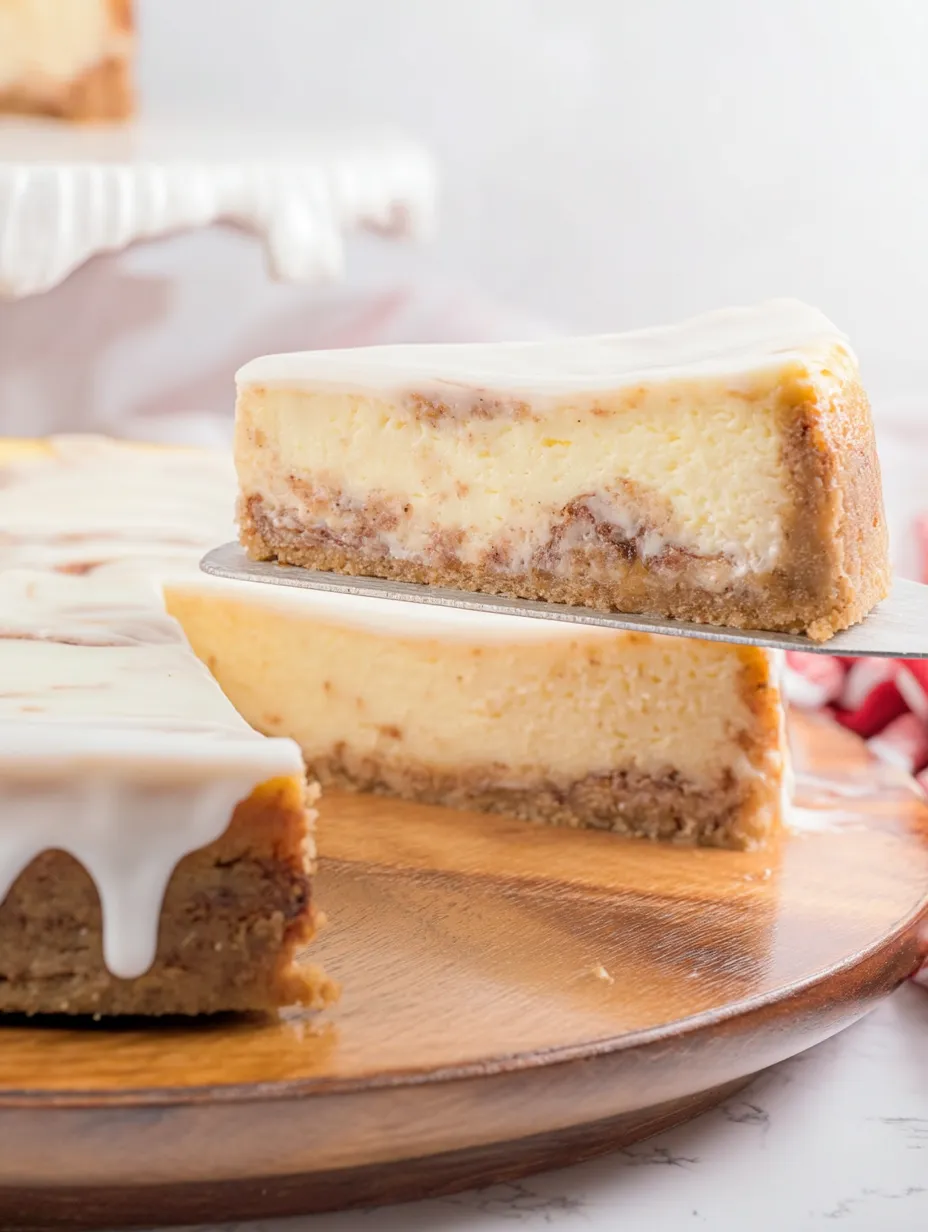
This honey bun cheesecake blends two favorite sweets into one amazing treat. The vanilla wafer base perfectly supports the creamy, honey-filled cheesecake, while the cinnamon swirls and sweet topping bring that honey bun taste to every mouthful.
I whipped this up for my sister's birthday celebration, and now it's what everyone in our family asks for when we get together. There's something about mixing that childhood honey bun flavor with rich cheesecake that takes people back to simpler times.
Ingredients
- Nilla Wafers: Give a sweet, vanilla-rich base that works beautifully with the topping
- Cream Cheese: Forms the tangy foundation and works best when it's full-fat and left out until soft
- Honey: Adds natural sweetness and real honey bun flavor - grab the good stuff for best taste
- Ground Cinnamon: Shows up in the crust and swirls to bring that warm, classic honey bun spiciness
- Sour Cream: Makes the cheesecake silkier and smoother than you'd get with just cream cheese
Easy-to-Follow Steps
- Get Your Crust Ready:
- Crush Nilla wafers into tiny bits using your food processor until they look like sand. Mix them with melted butter and cinnamon until every crumb gets wet. Push firmly into your springform pan, making an even layer on the bottom and partway up the sides. A measuring cup works great for packing it down. Stick it in the fridge while you work on the filling to help it firm up.
- Whip Up The Filling:
- Mix cream cheese and sugar on low until it's totally smooth and puffy, but don't whip in too much air. Drop in eggs one by one, mixing each one in fully before adding another. Stir in sour cream, honey, vanilla, and flour just enough to combine. You want it silky with no lumps, which is why warm ingredients matter so much.
- Build Your Layers:
- Pour half your cheesecake mix over the cold crust and spread it out evenly. Sprinkle half your cinnamon-brown sugar mix across the top. Carefully add the rest of the batter to keep the layers separate. Top with what's left of your cinnamon-sugar. Take a knife and make gentle swirls by pulling through both layers without mixing too much. Just 4-5 passes will make pretty patterns.
- Bake In Water:
- Put your springform pan inside a bigger pan and add hot water halfway up the sides. This creates steam that stops cracks and cooks everything evenly. Bake until the edges set but the middle still wobbles slightly. Turn the oven off, open the door a crack, and let the cheesecake cool slowly for 45 minutes. This gradual cooling also helps prevent cracks.
- Add Topping And Serve:
- After chilling at least 4 hours, make your glaze by mixing powdered sugar, milk, and vanilla until smooth. Take the cheesecake out of the pan by running a warm knife around the edges. Pour glaze over the top, letting it run down the sides. The glaze will harden a bit in the fridge before you cut it.
 Save Pin
Honey really shines in this dessert. I found that getting good local honey instead of the cheap stuff in plastic bears really kicks up the flavor. My family always notices when I splurge on the fancy honey from our local farmers market.
Nailing The Water Bath
Don't let the water bath scare you - it's your ticket to perfect cheesecake. Wrap your springform pan in foil before putting it in water to keep moisture out. The steam during baking keeps everything moist and stops that annoying crack down the middle that happens with most homemade cheesecakes. If you're worried about spilling hot water, you can put the springform in the bigger pan first, stick both in the oven, then carefully pour hot water into the outer pan.
Plan Ahead Perks
This cheesecake actually tastes better after a day or two, which is great when you're busy. You can make it up to two days before your event and keep it covered in the fridge. The flavors blend together even more over time, making it taste more amazing. Just add the glaze right before you serve it so it looks fresh. This makes honey bun cheesecake perfect for holidays or special events when you don't want to cook everything on the same day.
 Save Pin
Ways To Serve It
Take this already tasty dessert to the next level with simple extras. Try a little warm honey drizzle, some crunchy toasted pecans, or a spoonful of lightly whipped cream to bring out the flavors. For fancy restaurant-style slices, run your knife under hot water and wipe it dry between cuts for clean edges. This sweet treat goes perfectly with coffee or a glass of sweet Moscato wine.
Common Questions
- → How can I stop my cheesecake from cracking?
Get all ingredients to room temp and don't mix too much. Try baking in a water bath so the heat spreads evenly around the cake.
- → Is it okay to make the crust a day before?
You can definitely prep the crust and keep it in your fridge up to 24 hours ahead to cut down on cooking time.
- → Which honey should I pick for this recipe?
Go for a lighter, milder honey that won't take over the creamy cheesecake flavor.
- → What's the trick for making pretty swirls?
Take a knife and slowly swirl the cinnamon-sugar mix into your filling. Don't go too crazy with it or you'll lose that nice marble look.
- → What's the best way to keep leftover slices?
Cover them well and stick them in the fridge. They'll stay good for about five days.
- → Can I freeze this dessert?
Sure thing. Just wrap it up tight in plastic wrap and then foil. It'll keep in the freezer for three months. Let it thaw in the fridge before you want to eat it.