
 Save Pin
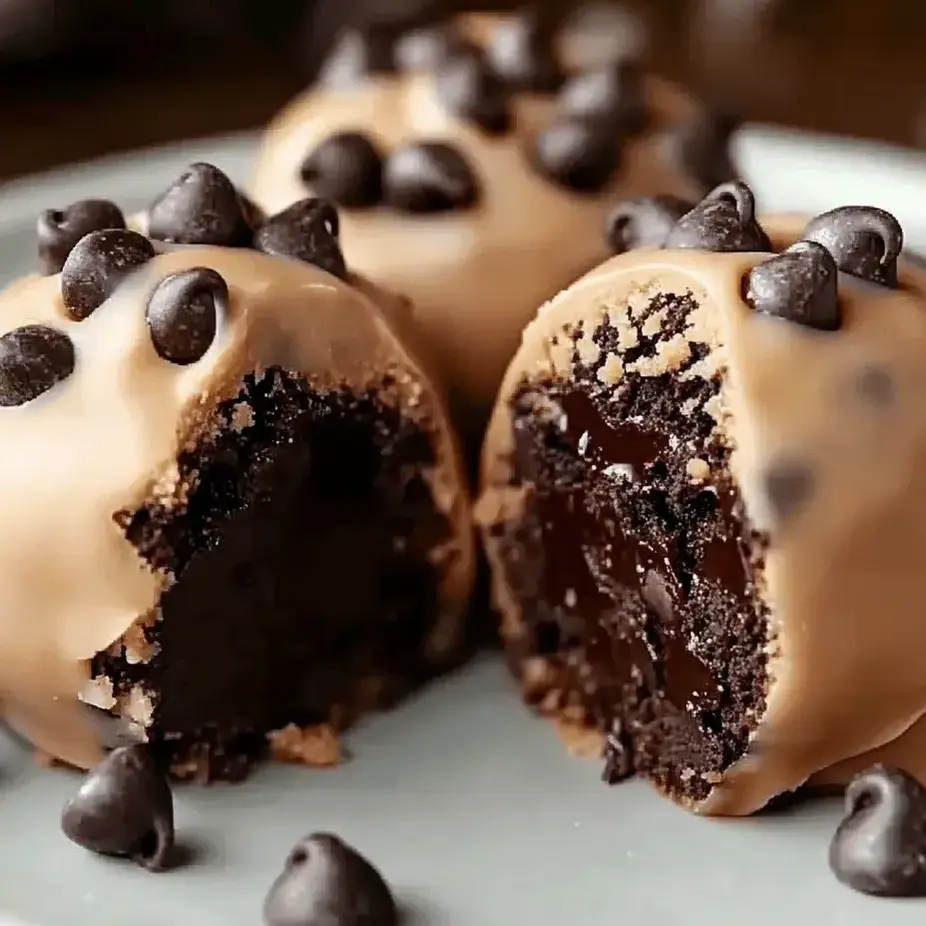
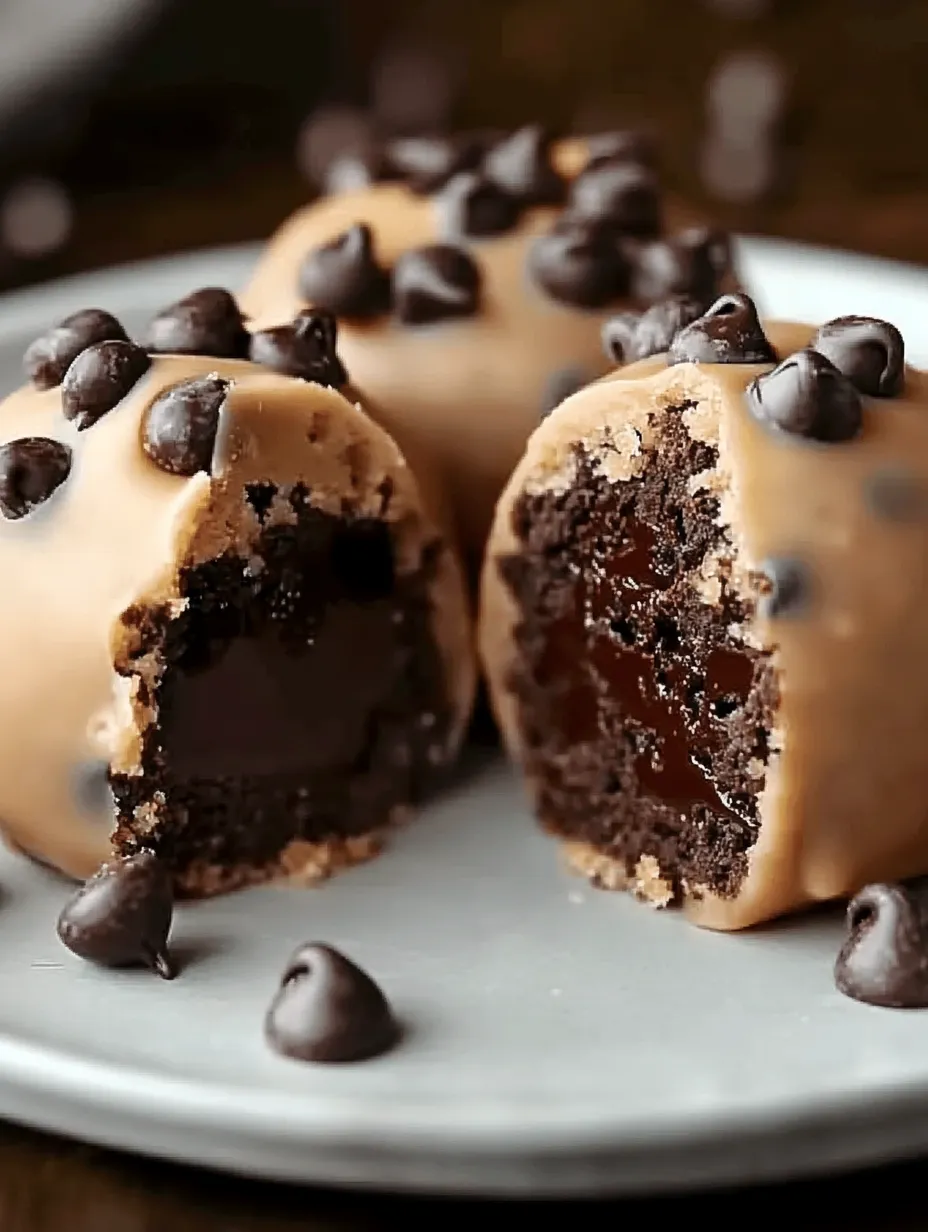
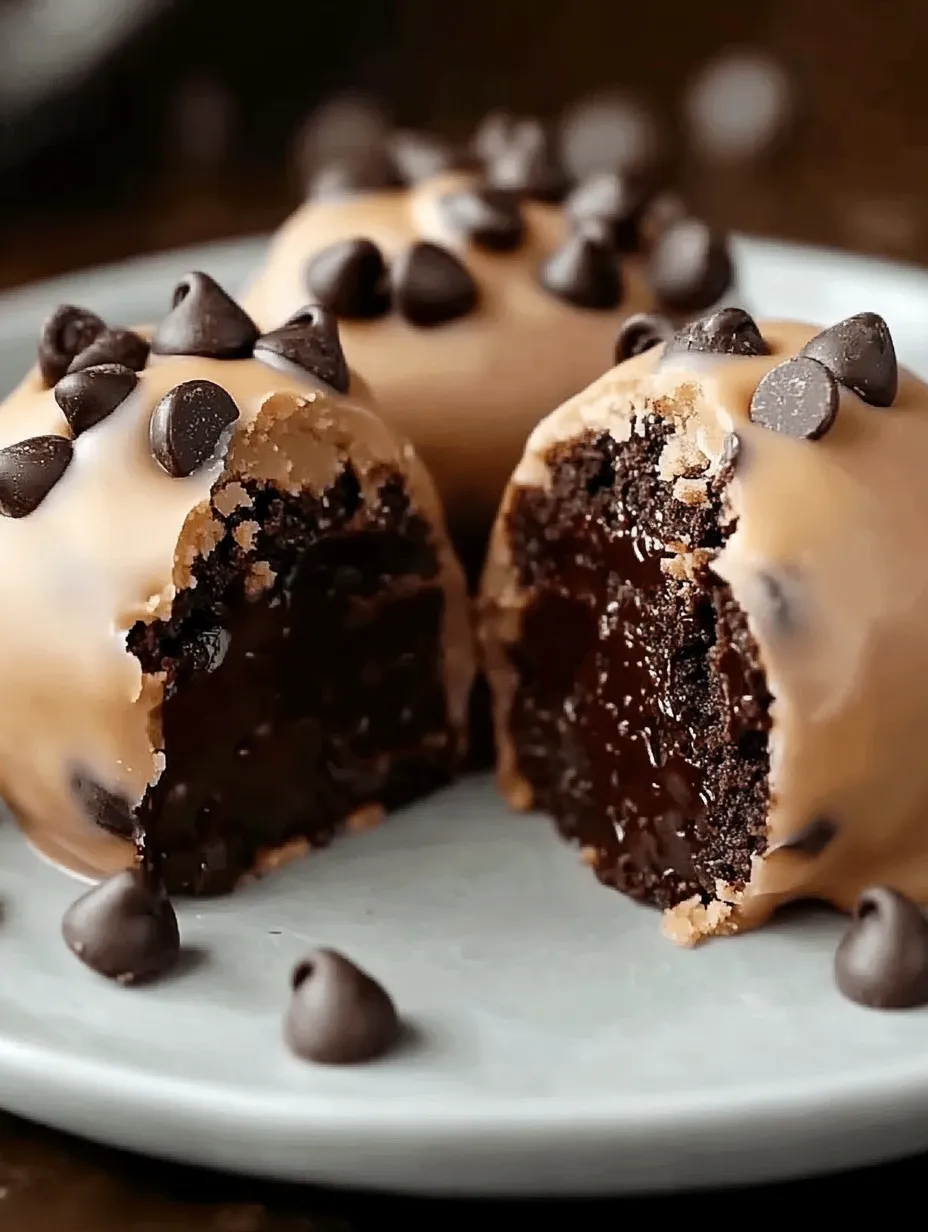
This gooey chocolate delight blends two sweet favorites into one mouthwatering, bite-sized explosion. The difference between the tender brownie outside and silky cookie dough inside makes for a rich treat that'll crush any dessert craving.
When I first whipped up these brownie bombs for my niece's party, they were gone before anyone cut into her cake. They've now turned into my go-to contribution for family events, with relatives messaging me several days early to check if I'm bringing "those amazing dough-filled things."
Ingredients
- For the Brownies: A box of brownie mix with the package-listed ingredients. Going with a good quality mix cuts down prep time but keeps the yummy taste.
- For the Cookie Dough Filling: Room temperature unsalted butter that'll mix smoothly with the sugars. Regular sugar gives sweetness and helps build the right dough feel. Light brown sugar adds moisture and that typical cookie flavor. Milk works to pull the dough together without using eggs. Vanilla extract boosts all flavors—try to grab pure stuff for best results. Regular flour builds the backbone of our egg-free cookie dough. A bit of salt cuts through the sweetness, which matters even in desserts. Tiny chocolate chips spread better throughout the small balls of dough.
- For the Chocolate Coating: Semisweet chocolate chips or candy melts form a smooth outer layer that breaks nicely when you bite in. A bit of vegetable oil makes the chocolate thinner for easier dipping and gives it a shinier look.
Step-by-Step Instructions
- Prepare the Brownies:
- Follow box directions to mix and bake brownies in a parchment-lined 9×13 inch pan. The parchment paper makes it super easy to lift them out after cooling. Don't overbake—slightly soft brownies will wrap around the cookie dough better.
- Make the Cookie Dough Filling:
- Mix butter and sugars till they're noticeably fluffier and lighter, about 3 minutes with your electric mixer. This adds air for better texture. Put in milk and vanilla, stirring until everything's mixed with no liquid sitting separately. Slowly add your flour and salt, mixing on low so you don't get flour everywhere. Use your hands to fold in the mini chips so they don't break up in the mixer.
- Assemble the Brownie Bombs:
- Cut your cooled brownies into roughly 1.5 inch squares. Take your time—this can get messy. Put a cold cookie dough ball in the middle of a brownie square, then carefully fold the brownie edges up and all around to cover the dough completely. Roll it gently between your hands to make a smooth ball, using light pressure. Set your finished bombs on a paper-lined baking sheet with space between them.
- Coat with Chocolate:
- Melt your chocolate in the microwave, 30 seconds at a time, stirring well between each round so it doesn't burn. Make sure it's completely smooth but not too hot or you'll melt your brownie balls. Dunk each bomb using a fork underneath it rather than sticking it. Tap the fork gently on the bowl's edge to let extra chocolate drip off before carefully sliding it onto parchment paper.
 Save Pin
I love watching people bite into these for the first time. There's always that surprised look when they hit the cookie dough center after thinking it's just a chocolate ball. My kid helps make these every Christmas now, and she's gotten really good at the dipping part, making perfect chocolate shells without making a big mess.
Storage Solutions
These brownie bombs stay fresh for up to a week when kept in a sealed container in your fridge. The cold helps keep the cookie dough middle creamy while making the chocolate coating firm enough to give a nice crack when bitten. If you want to keep them longer, you can freeze the finished chocolate-covered bombs for up to three months. Just put them in one layer in a freezer container with parchment between layers so they don't stick together. Let them thaw in the fridge overnight before you serve them.
Troubleshooting Tips
If your brownie bombs crack while you're making them, your brownies might be too dry or cold. Try cooking your brownies a little less next time, or warm the brownie pieces in the microwave for 5-7 seconds before wrapping them around the dough. Got coating that's too thick? Add another teaspoon of oil and mix well. If your chocolate starts hardening too fast during dipping, set the bowl over some warm water to keep it at the right thickness throughout the process.
 Save Pin
Flavor Variations
Switch up these brownie bombs with easy ingredient changes for tons of options. Want mint chocolate bombs? Add a quarter teaspoon of peppermint extract to your cookie dough and swap in Andes mint pieces for the chocolate chips. For peanut butter bombs, mix a quarter cup of smooth peanut butter into the cookie dough and use peanut butter chips instead of chocolate ones. During the holidays, try mixing crushed candy canes into the dough and sprinkling the tops with colorful holiday sprinkles before the chocolate hardens.
Common Questions
- → How do I store brownie bombs?
Keep them in the fridge in a sealed container for up to a week. Let them sit out a bit before eating for the yummiest texture.
- → Can I make these ahead of time?
You bet. Make them a couple days before you need them. Just keep them cold and add the chocolate layer when you're almost ready to serve them.
- → How can I ensure the flour is safe to eat?
Toast your flour in the oven at 350°F (175°C) for about 5 minutes on a flat baking tray. Wait until it cools down before you mix it in.
- → Can I use white chocolate for the coating?
You sure can. White chocolate gives these bombs a sweeter taste and they'll look really pretty too.
- → What if I don't have mini chocolate chips?
Just cut up normal chocolate chips into tiny bits or grab a chocolate bar and chop it into small pieces.