
 Save
Save
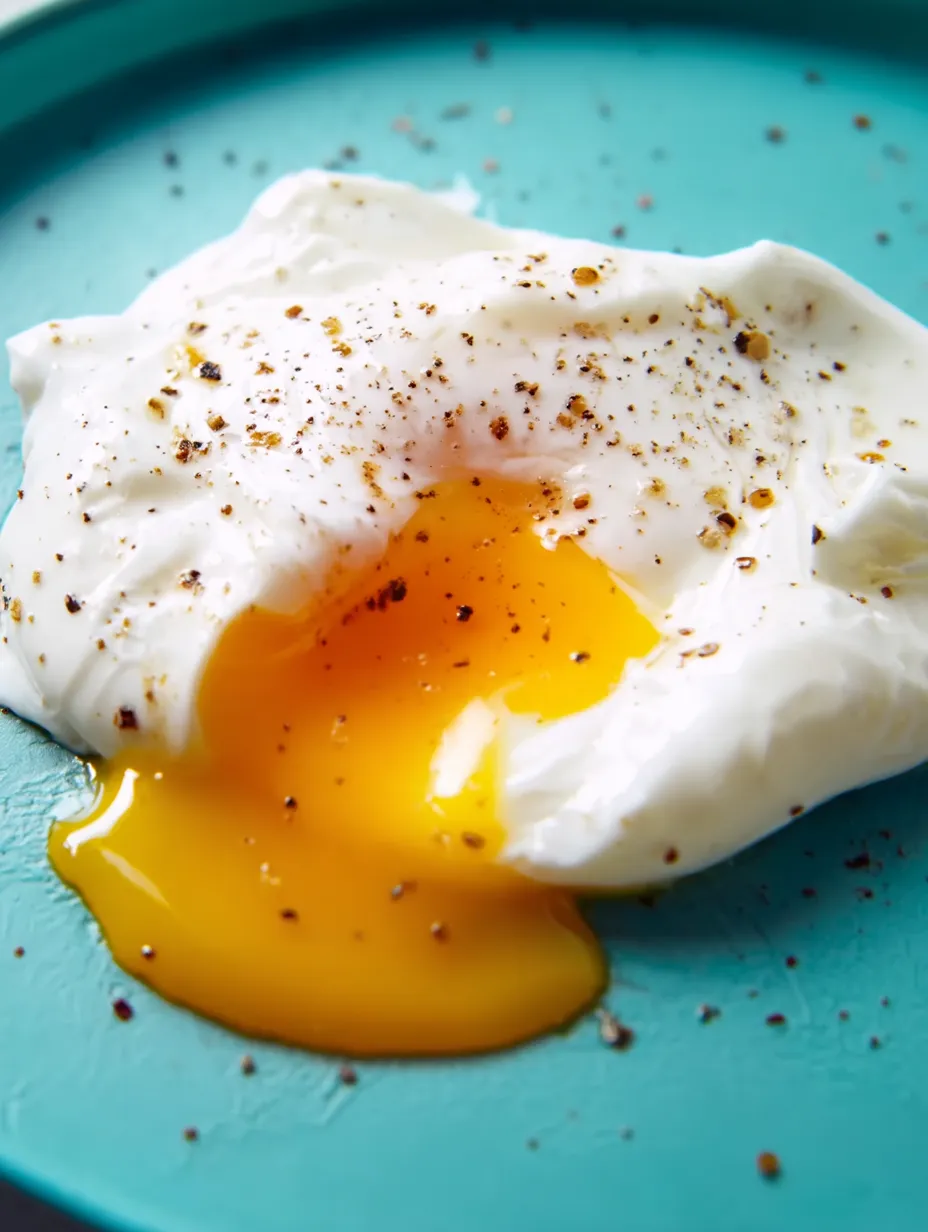
I stumbled on this microwave poaching trick while rushing through a hectic week, craving fancy eggs but short on time. Now it's the only way I make silky whites with gooey centers in just a few minutes—you'd never know they weren't done the old-fashioned way!
At first I wasn't sold on microwaving eggs instead of using a pot. But after playing around with this method, I actually reach for it more than stovetop poaching now. You get better control and the results don't lie.
Ingredients
- Water: forms the gentle bath that helps the egg cook evenly all around
- Vinegar: makes the whites come together quickly so they stay in a nice shape
- Kosher salt: boosts the taste and helps the proteins stick together better
- Large fresh egg: works best because newer eggs don't spread out as much
Step-by-Step Instructions
- Mix Your Poaching Bath:
- Stir water, vinegar, and salt together in a microwave-safe bowl until everything's mixed in. This combo stops the egg from floating all over and keeps it nicely shaped.
- Warm The Water:
- Put the mixture in the microwave for about 4 minutes, stopping every minute to check, until it hits 209-212°F. Getting this temperature just right means your egg won't overcook.
- Drop In The Egg:
- Take the hot bowl out carefully using something to protect your hands, then slowly slide the egg into the water. Going slow helps keep the yolk intact and whites tight.
- Cook The Egg:
- Put the bowl back in the microwave and cook at 80% power for roughly 1 minute and 20 seconds. The lower setting gives you that tender poach without harsh heat.
- Get Ready To Serve:
- While it's cooking, grab a plate and put a paper towel on it to soak up extra water from your finished egg.
- Finish And Serve:
- Lift the egg out with a slotted spoon so water can drip away. Put it on your paper towel, snip off any scraggly bits if you want, and eat it while it's hot.

The vinegar does the heavy lifting in this method. I worried it might make the eggs taste funny, but you only need enough to help the whites firm up—not enough to taste. I've tried several kinds and rice vinegar is the most subtle, though any mild one works fine.
Getting the Perfect Yolk
What we're all after is that magic moment when the whites are set but the yolk flows like liquid gold. If your first try gives you hard yolks, cut back cooking time by 10-15 seconds next time. If the whites seem too jiggly, add another 10 seconds. Microwaves aren't all the same, so jot down what works for yours once you nail it.
Creative Serving Ideas
Turn your poached eggs into a full meal without much fuss. They're amazing on top of avocado toast with some red pepper flakes, dropped into a bowl of ramen for extra richness, or paired with some cooked greens and crusty bread. For the classic morning treat, try homemade eggs benedict—these microwave eggs make that fancy dish so much easier to pull off.
Troubleshooting Common Issues
When egg whites fan out too much, your eggs probably aren't fresh. Store them pointy end down in the fridge to keep the yolk centered. If your yolks break while cooking, your water might be too hot or you're cooking them too long. Don't forget eggs keep cooking a bit after you take them out, so it's better to pull them early than leave them too long.
Frequently Asked Recipe Questions
- → Which vinegar should I use?
Go with any mild option like apple cider vinegar, rice vinegar, or white wine vinegar for best results.
- → How can I make sure my egg cooks properly?
Get the water between 209–212ºF before you add your egg and set your microwave to 80% power for the best outcome.
- → Can I swap kosher salt for regular table salt?
Sure thing, just remember to use half the amount since table salt packs more punch than kosher salt.
- → What's the trick to keeping the yolk runny?
Watch the clock closely and cook in short bursts to avoid firming up that golden center.
- → Do I really need to trim the egg whites?
Nope, that's just for looks. Skip it if you're in a rush or don't care about fancy presentation.